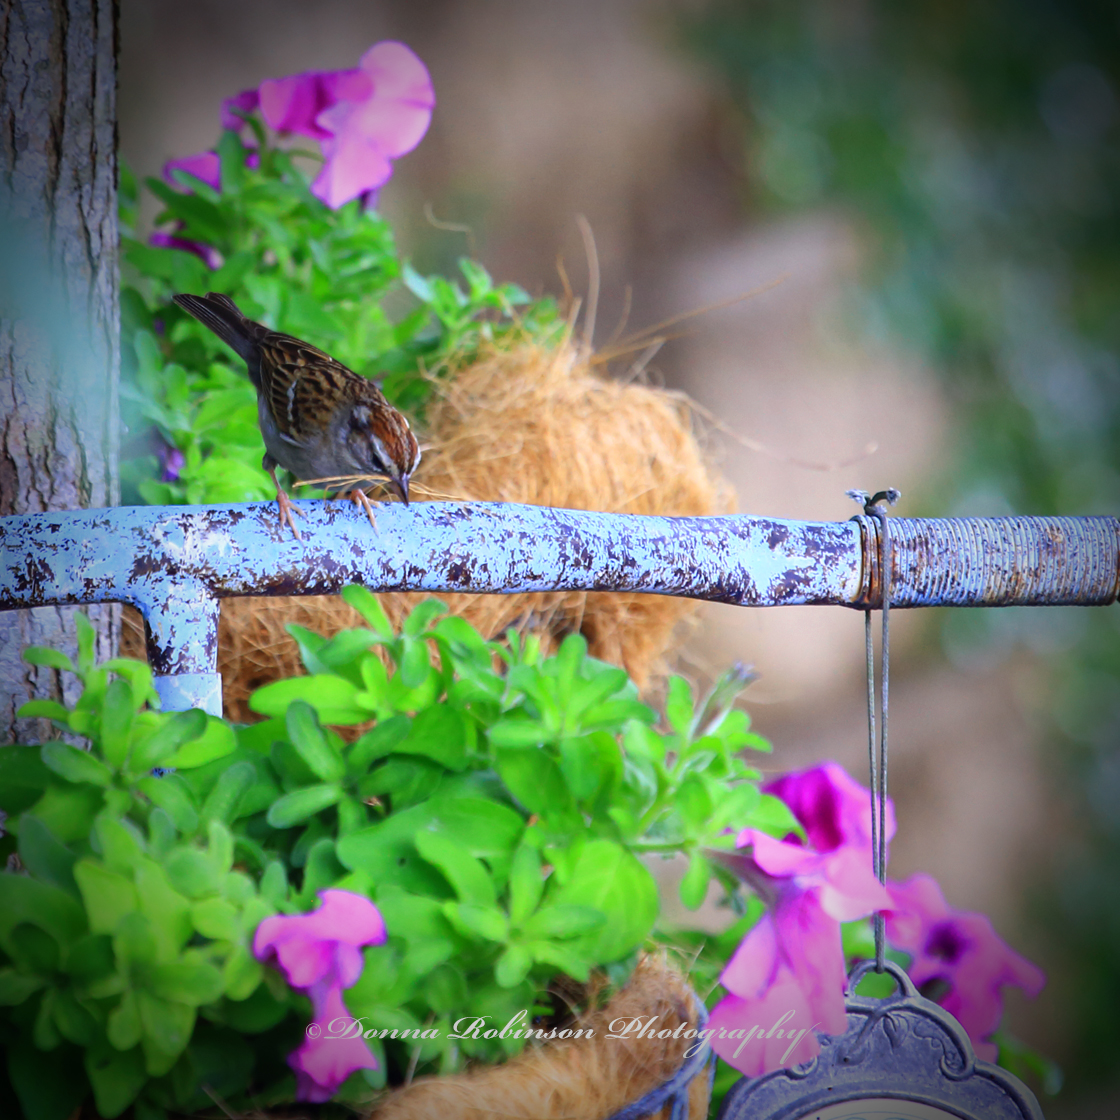
It’s a new week of the Lens Artist Challenge and John from Travels with JohnBo has us sharing our “Go to Places” for photography (you can read John’s original post here). It’s a wonderful theme and one that I didn’t have to think too much about, because really any place I have my camera becomes my “go to place.” But specifically, my “go to place” is anywhere I can be outside connecting with nature.
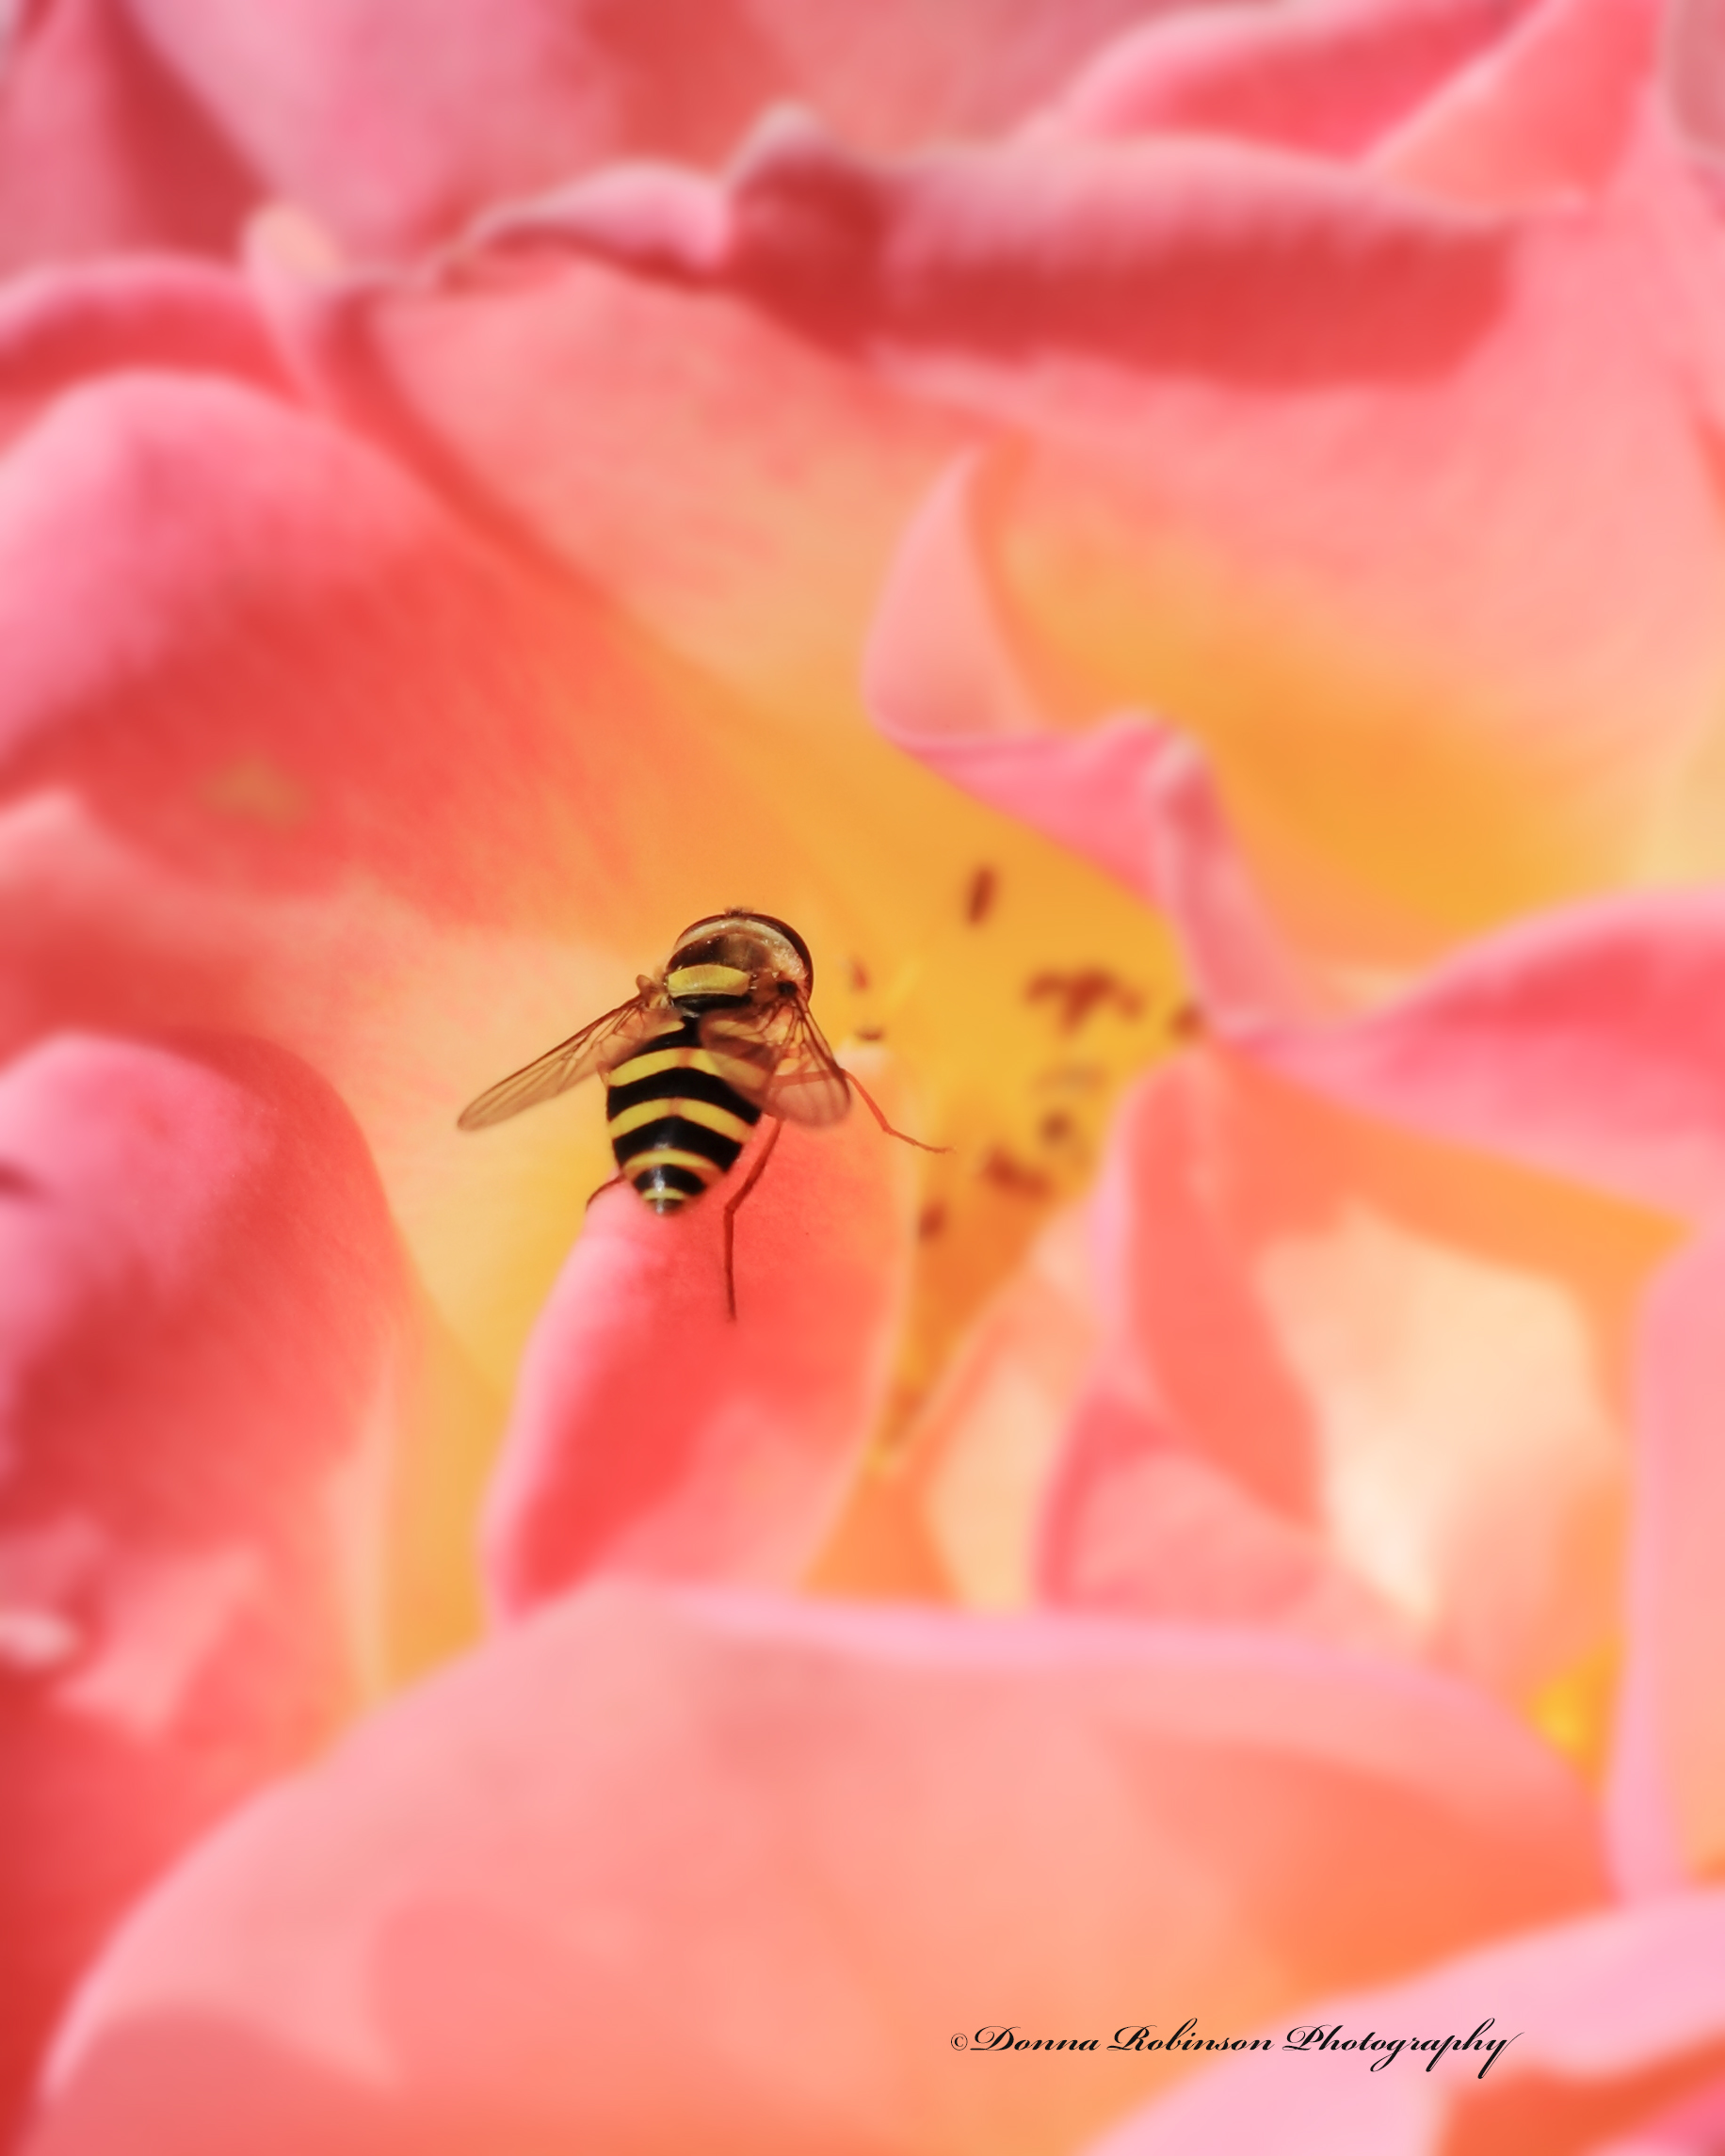
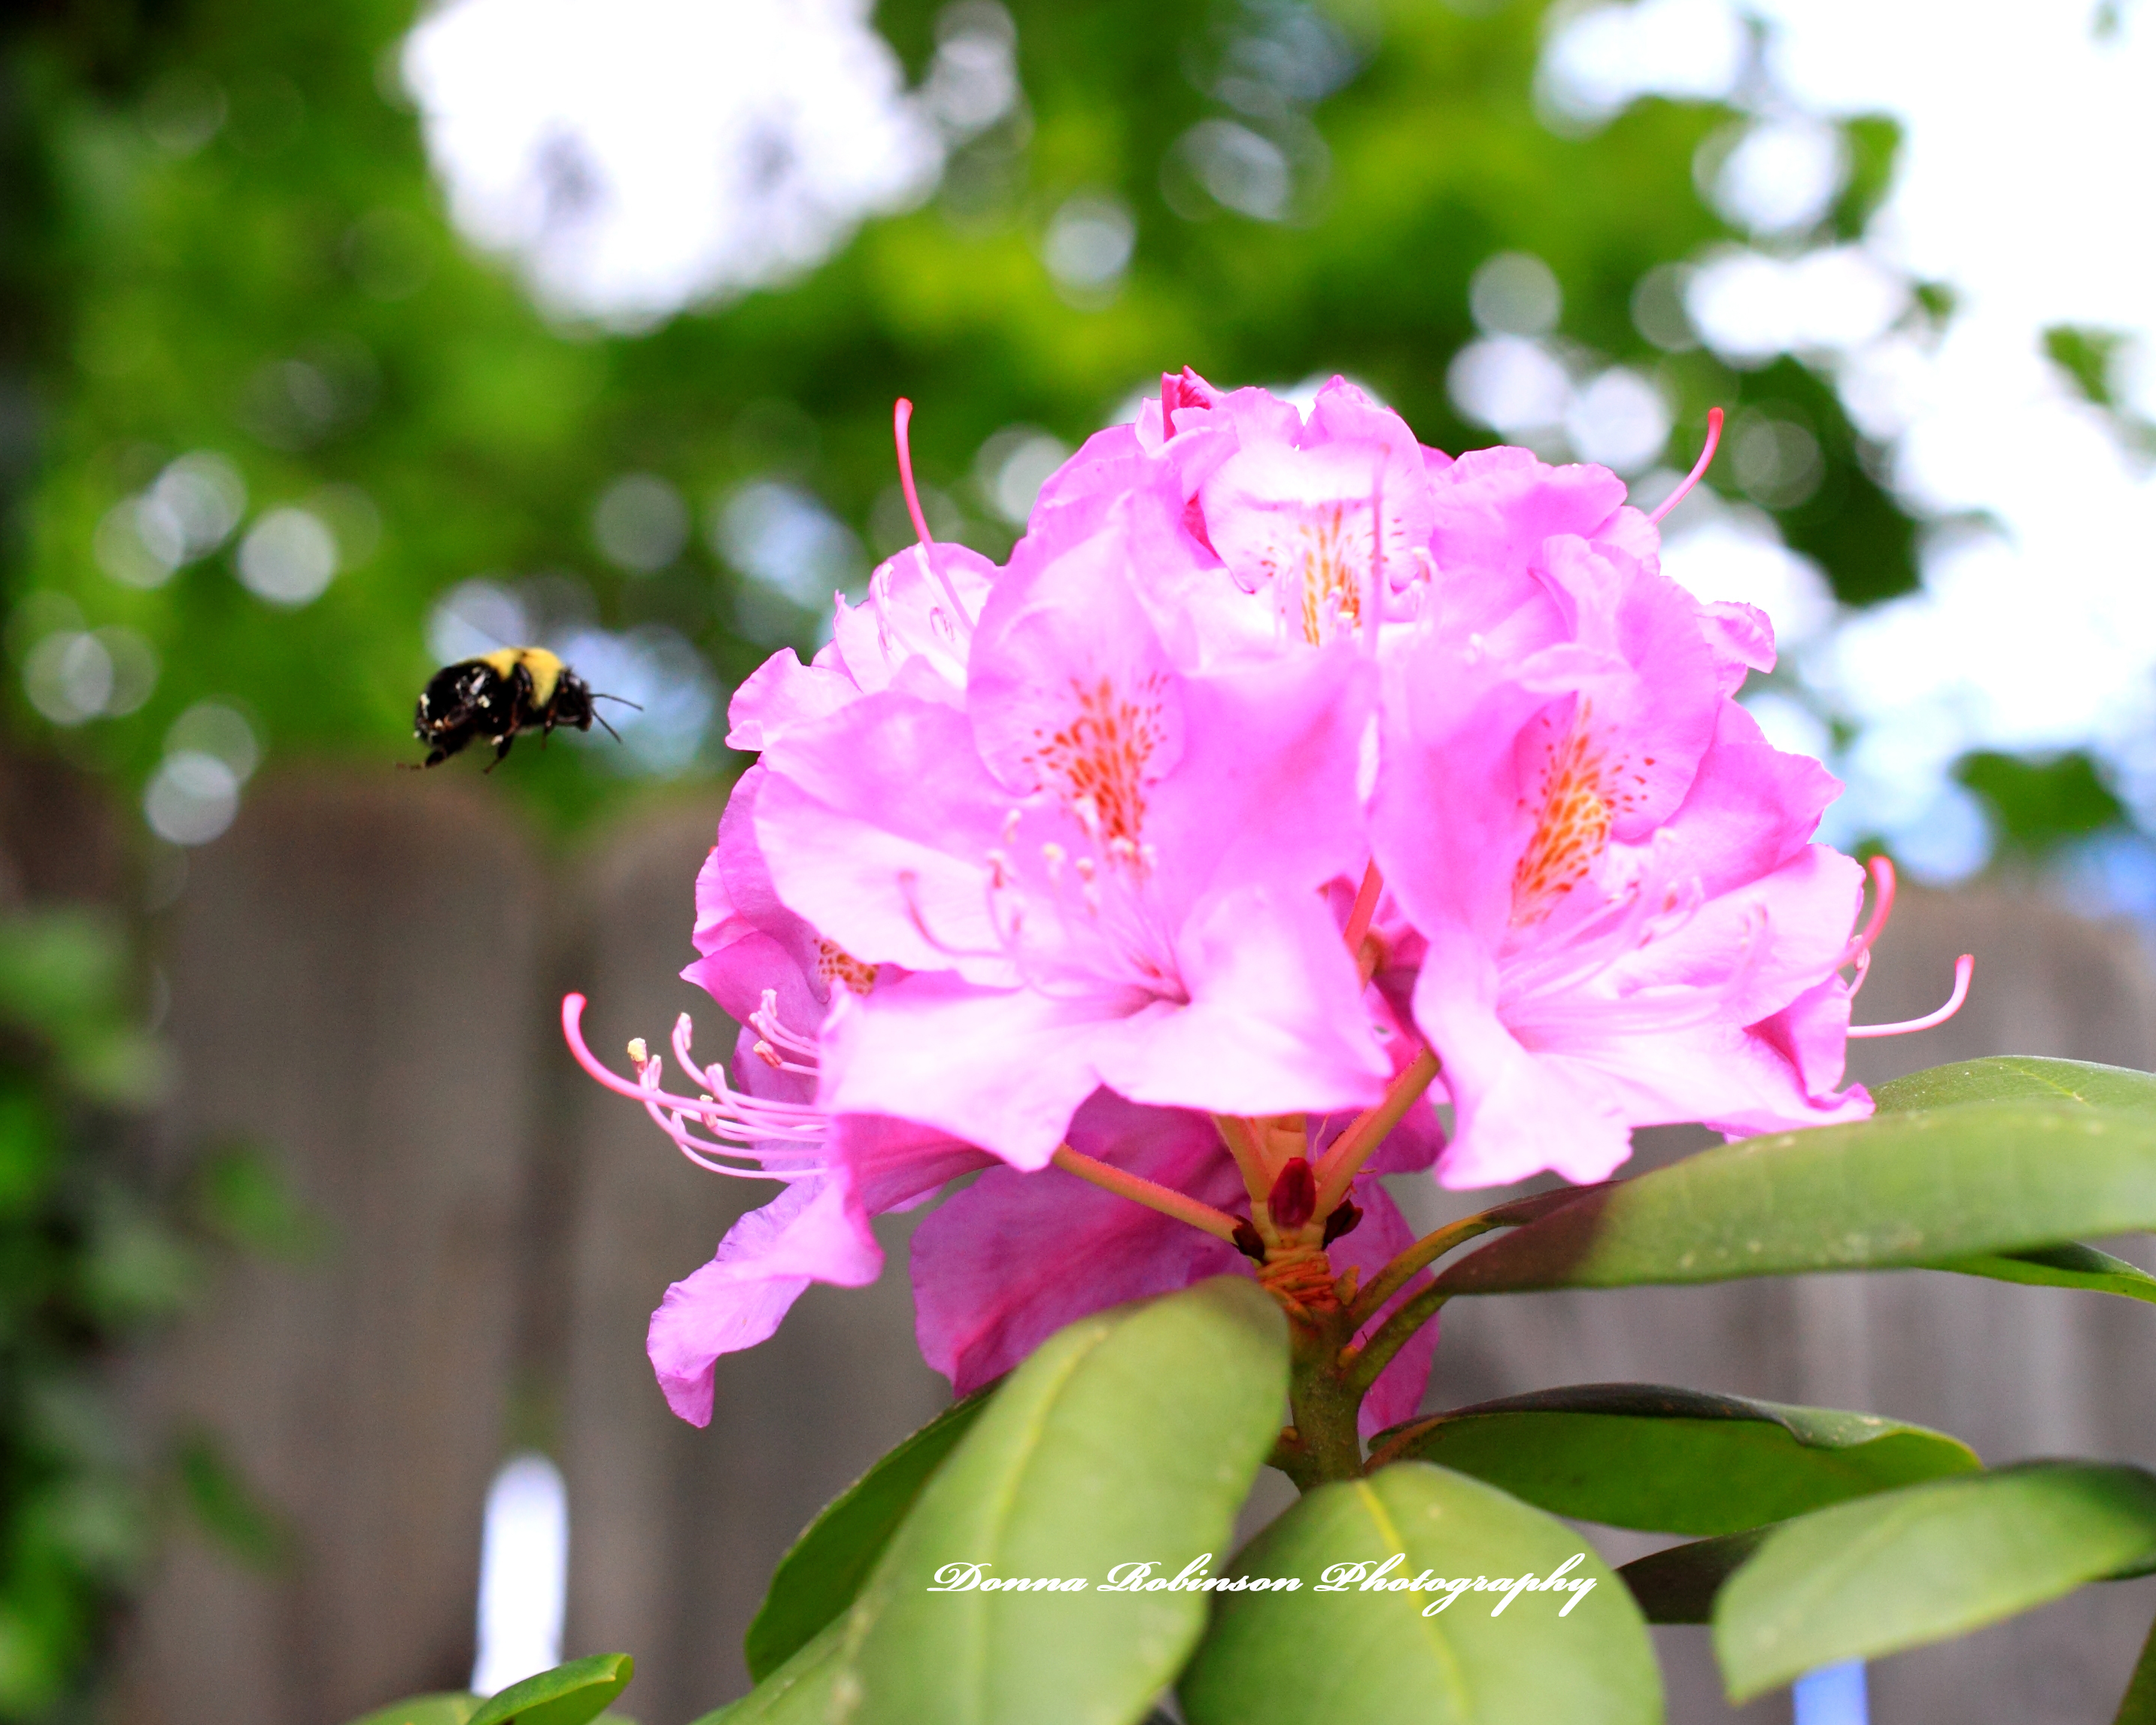
It can be in a garden enjoying the blooms and color while watching the birds and insects gathering food and nectar:
Macro Photography of a Sunflower with a BugBee Pollenating on Rododendron
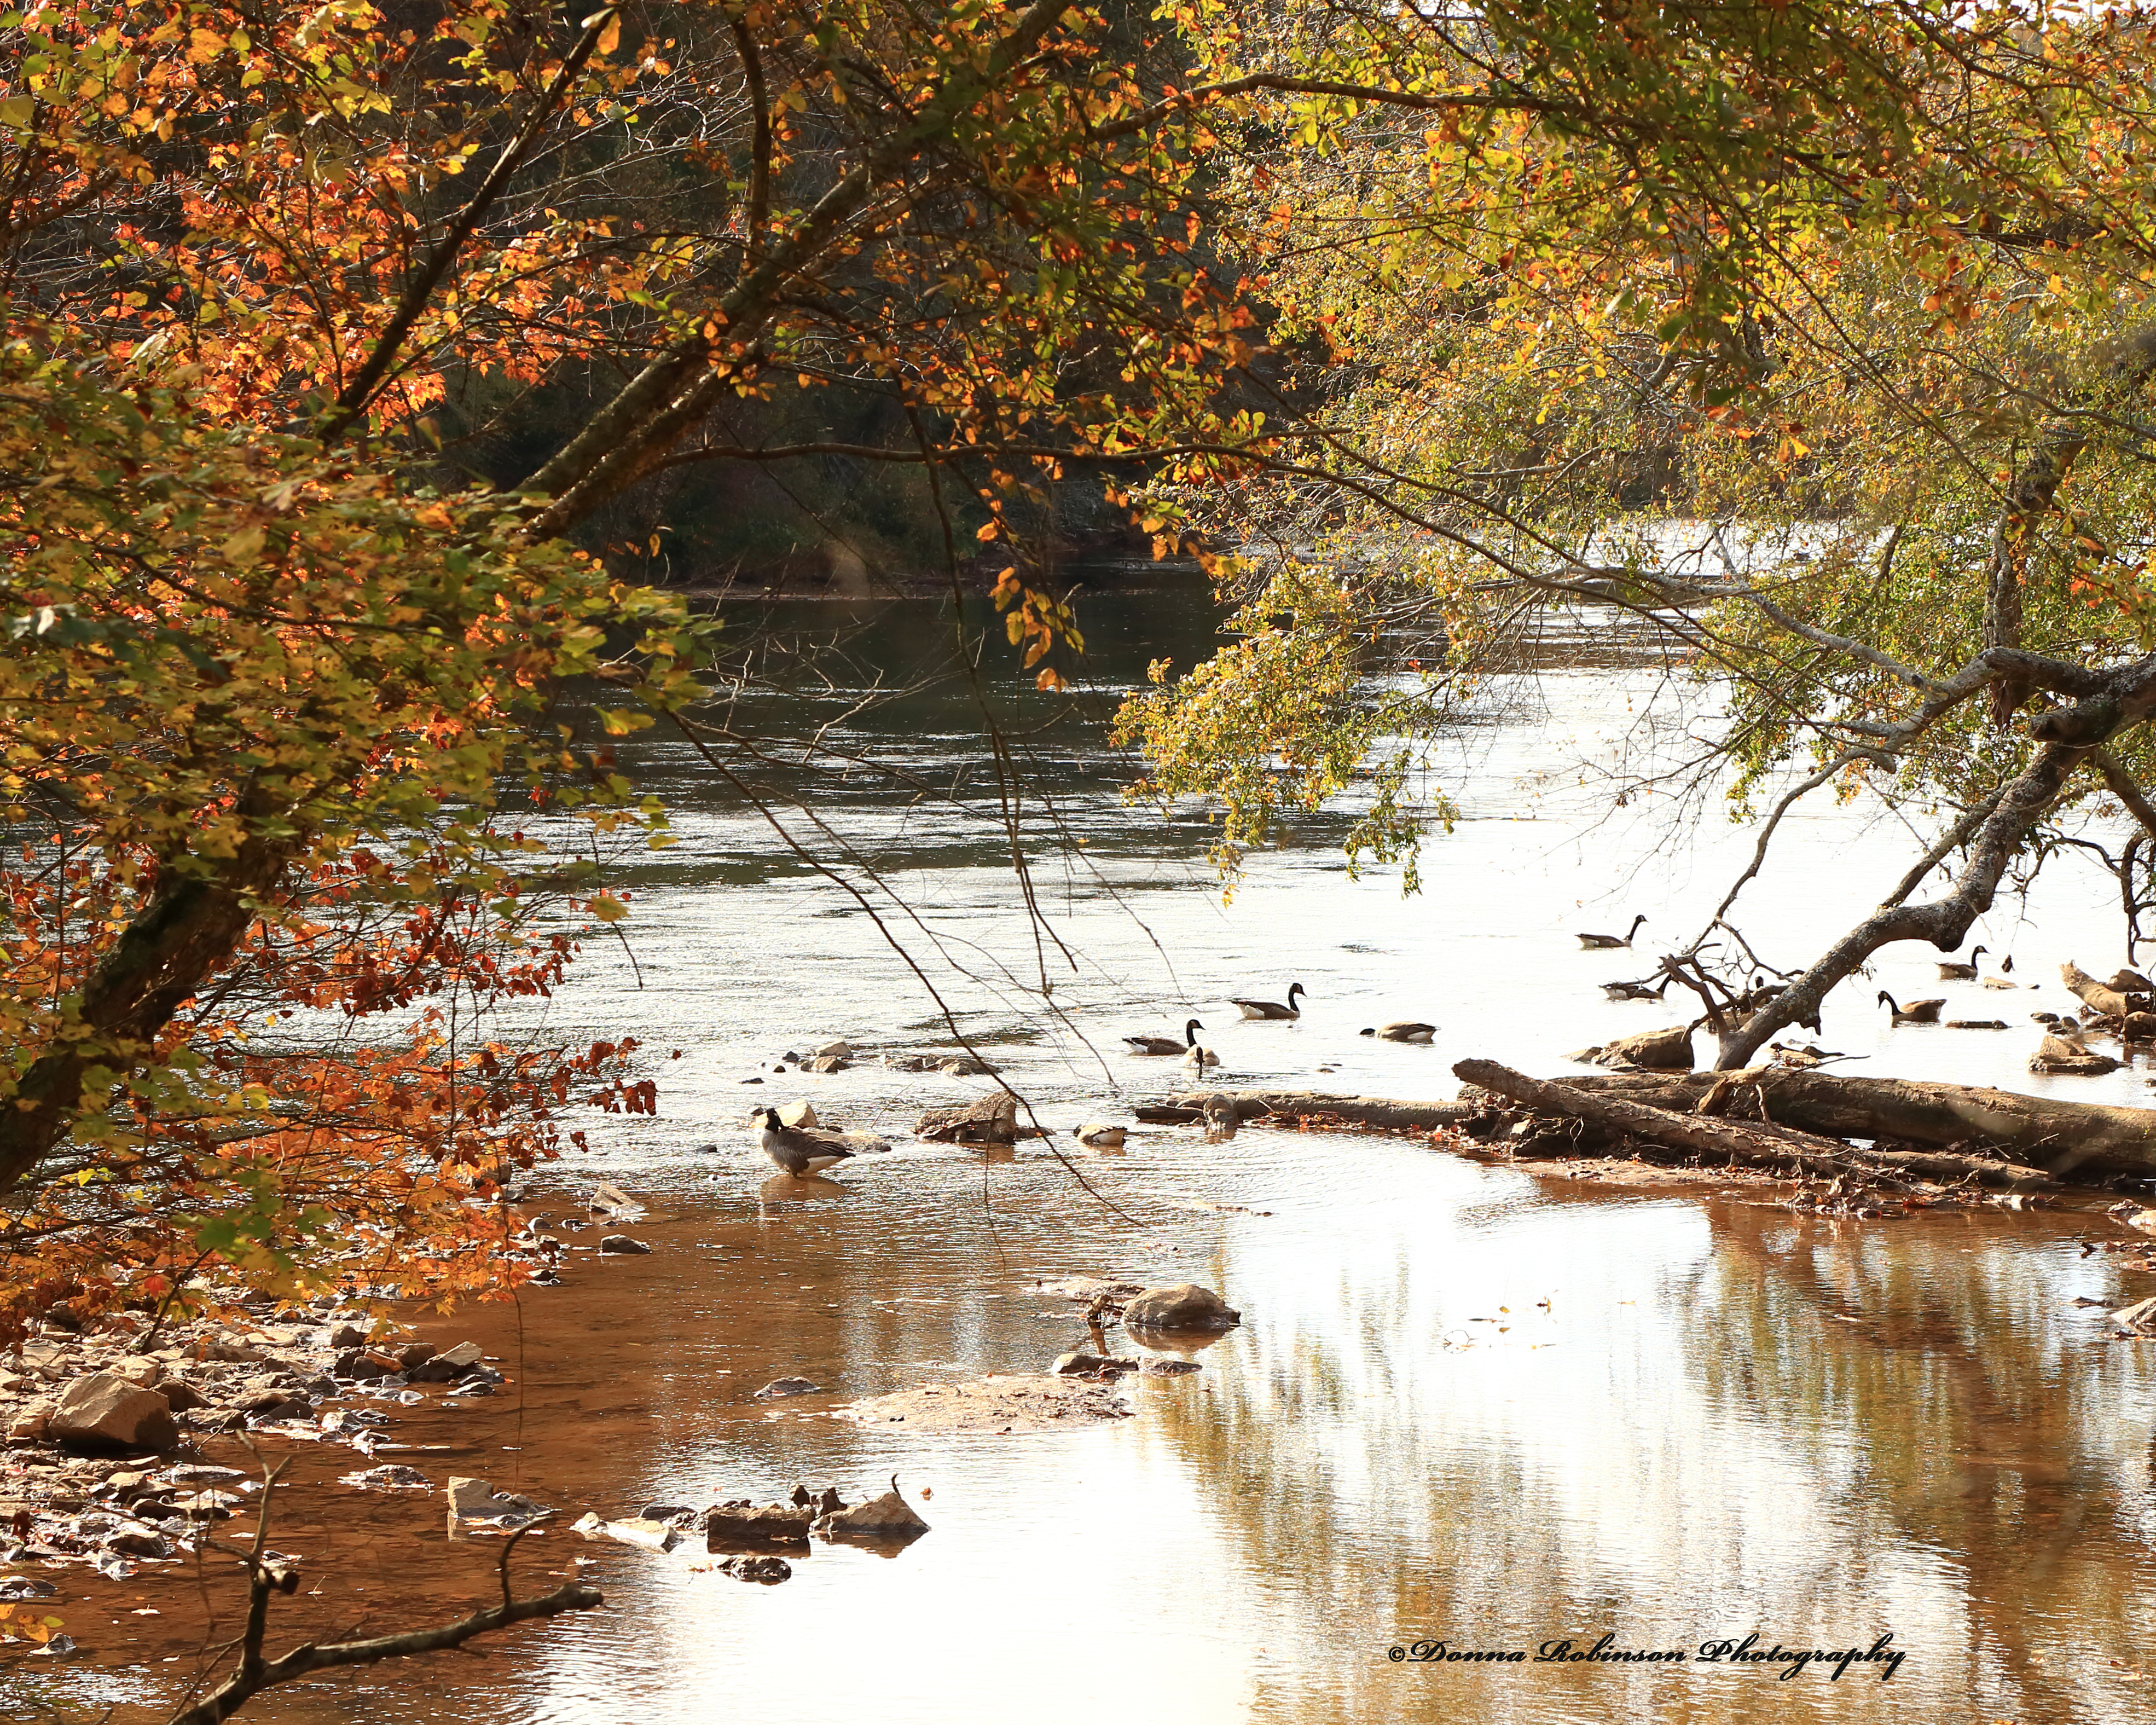
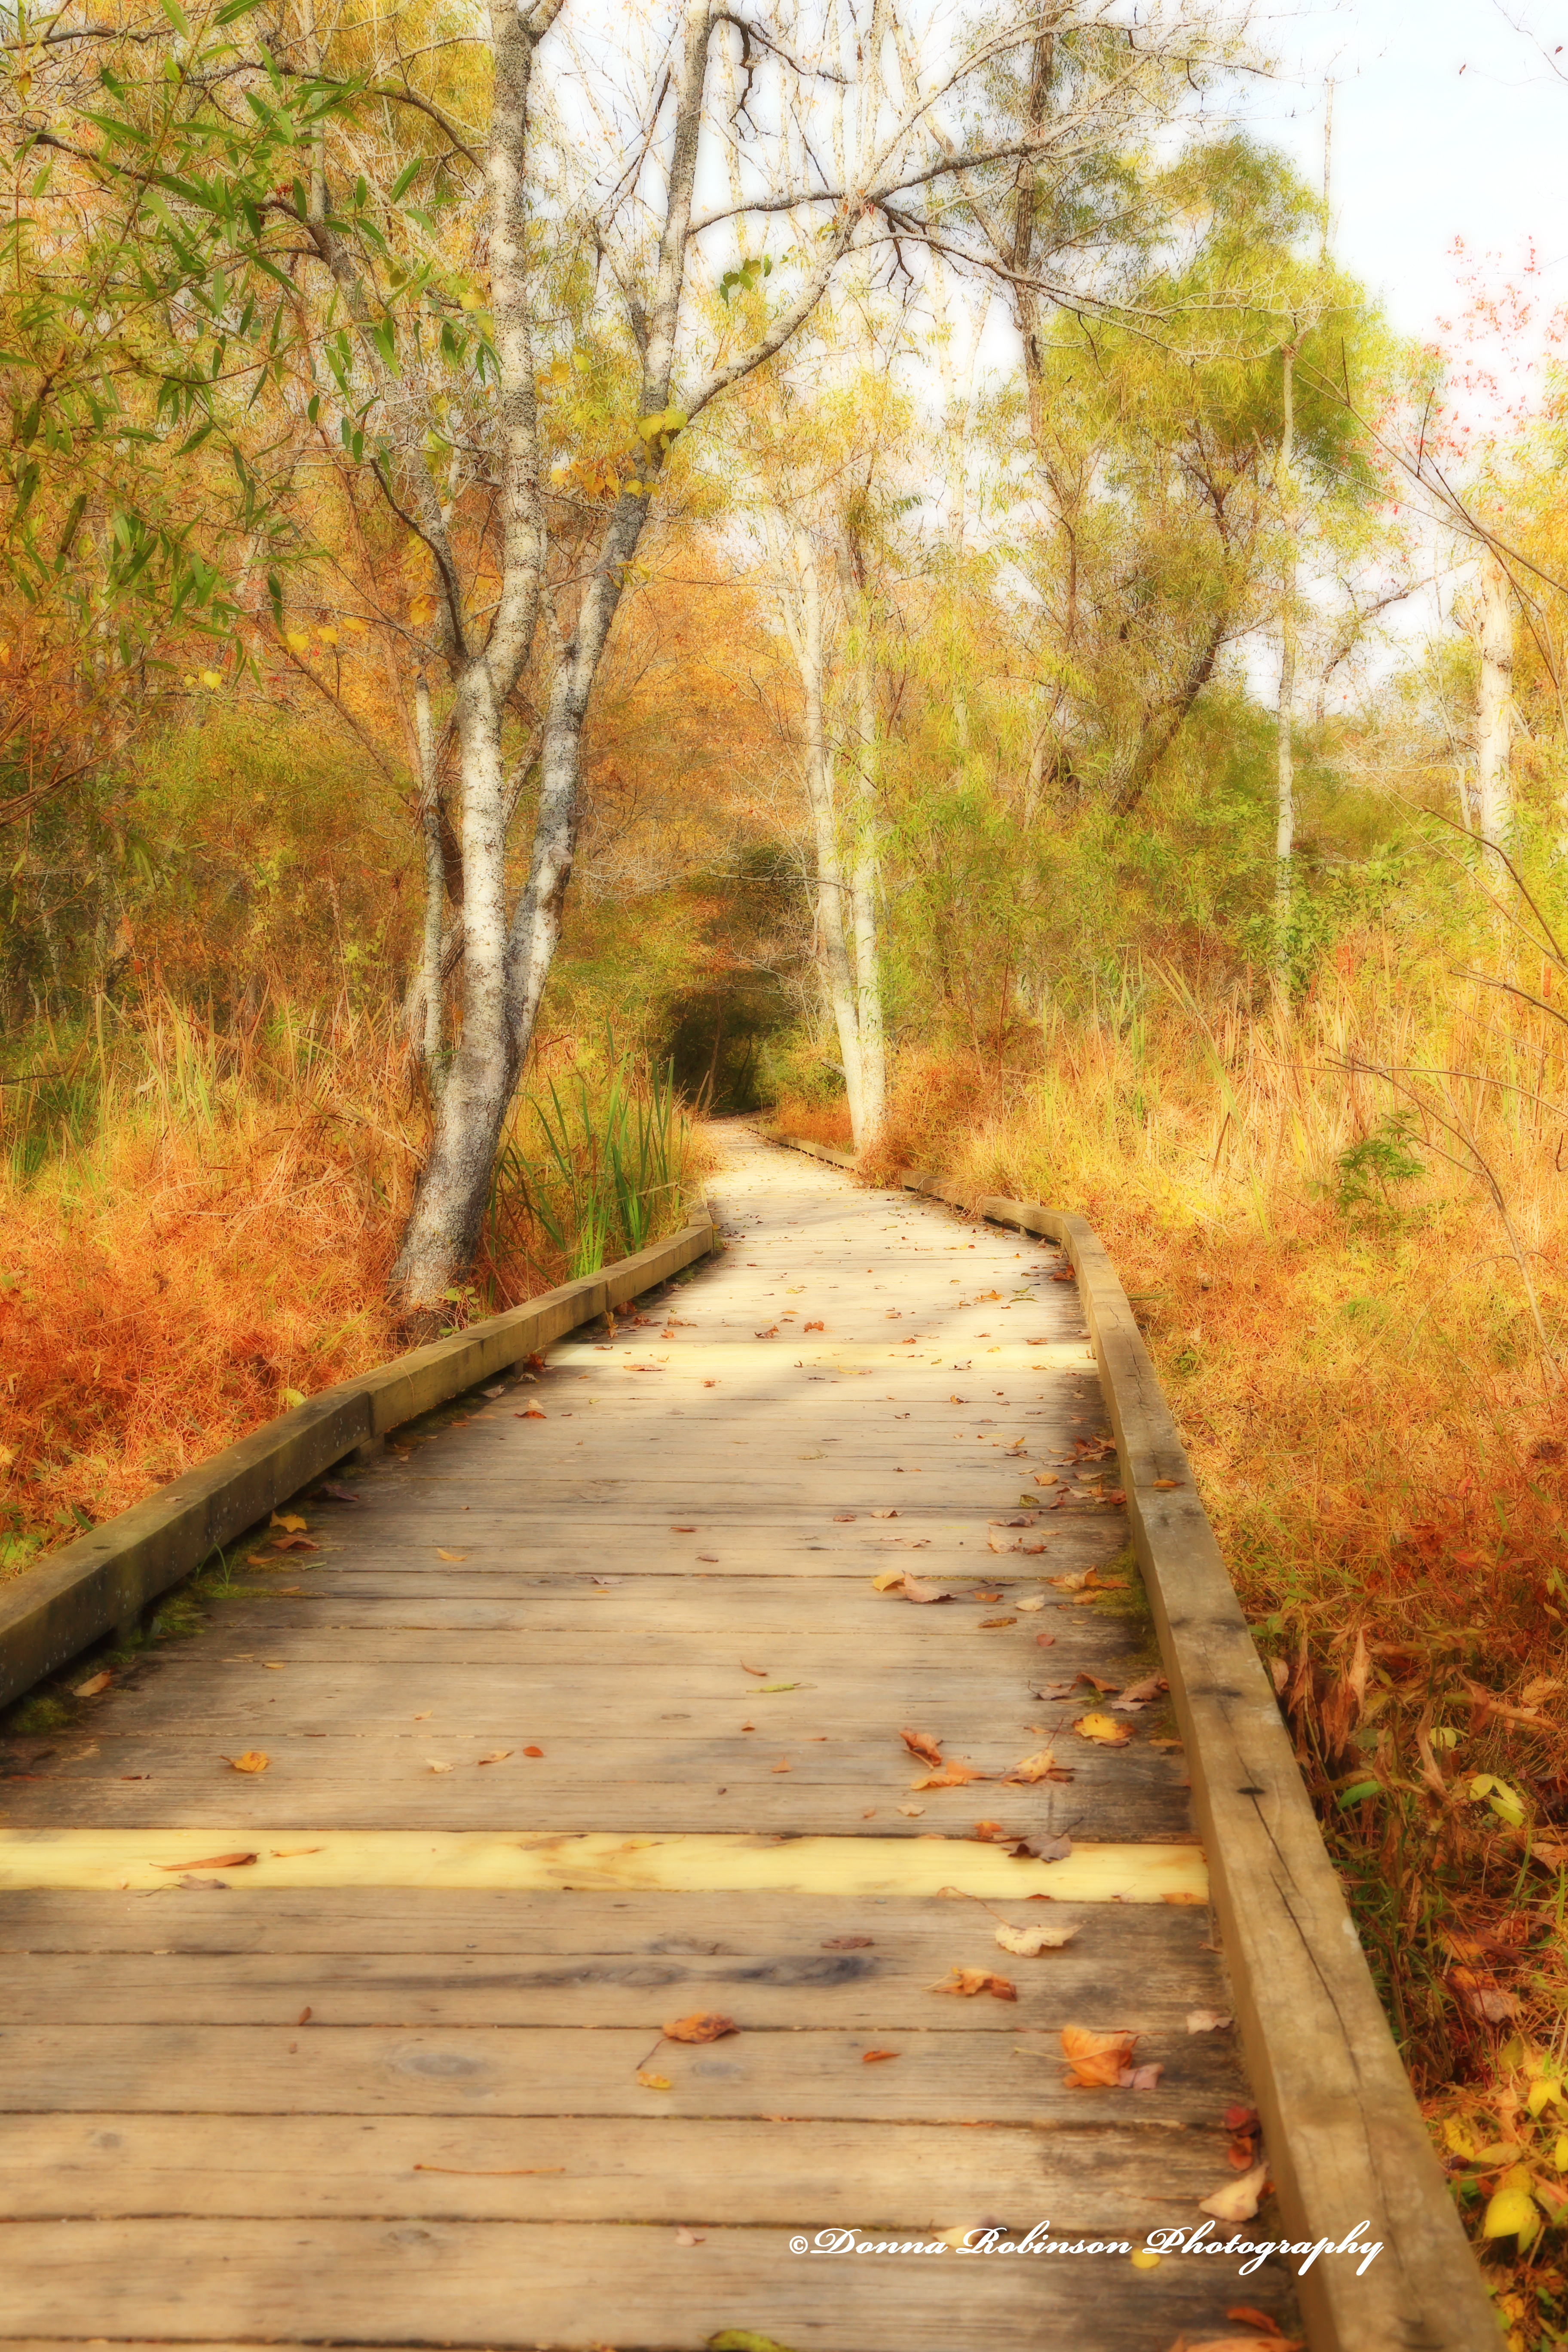
It can be a walk in the park on a Fall Day enjoying the crisp air and changing colors of the leaves:
IMG 8175
Or walks along the beach taking in the salt air and ocean breezes.
So where is your “Go to Place” when you need inspiration?
Many thanks to John for this wonderful challenge. Next week, Sofia will host. Be sure to follow her here so you don’t miss her post, which will go live next Saturday at noon Eastern time.
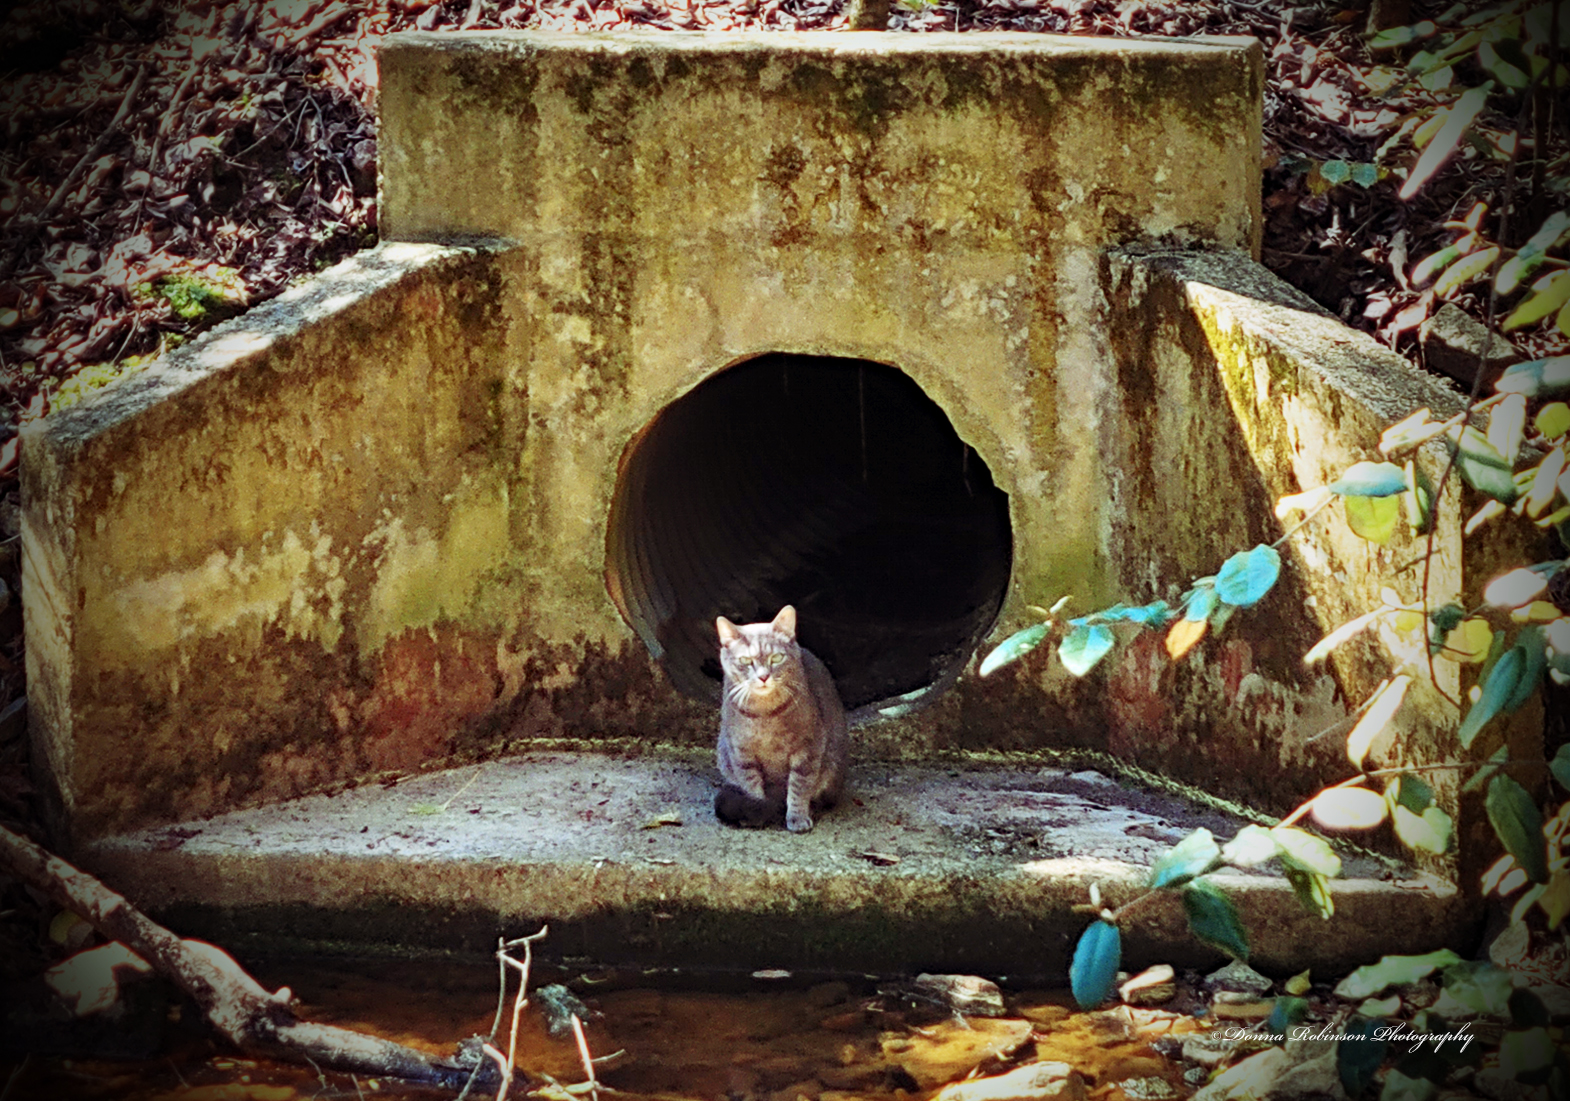
Hello Friends! Today I have a cute photo to share with you that I took last week during one our walks in the park.
I don’t know why this caught my attention. Perhaps it was the way the cat stared at me while I clicked a few photos. Possibly because it looked as though he was guarding some treasure, he had hidden in the water drain. Whatever the reason, I thought it made for an interesting photo.
Taken with my Samsung Galaxy Note 20, I brought the original image into Photoshop, did a little haze removal, made a few color corrections with the “LOMO” and “Vignette” auto functions and voila! I really like how the colors show the texture of the environment around him. What do you think?
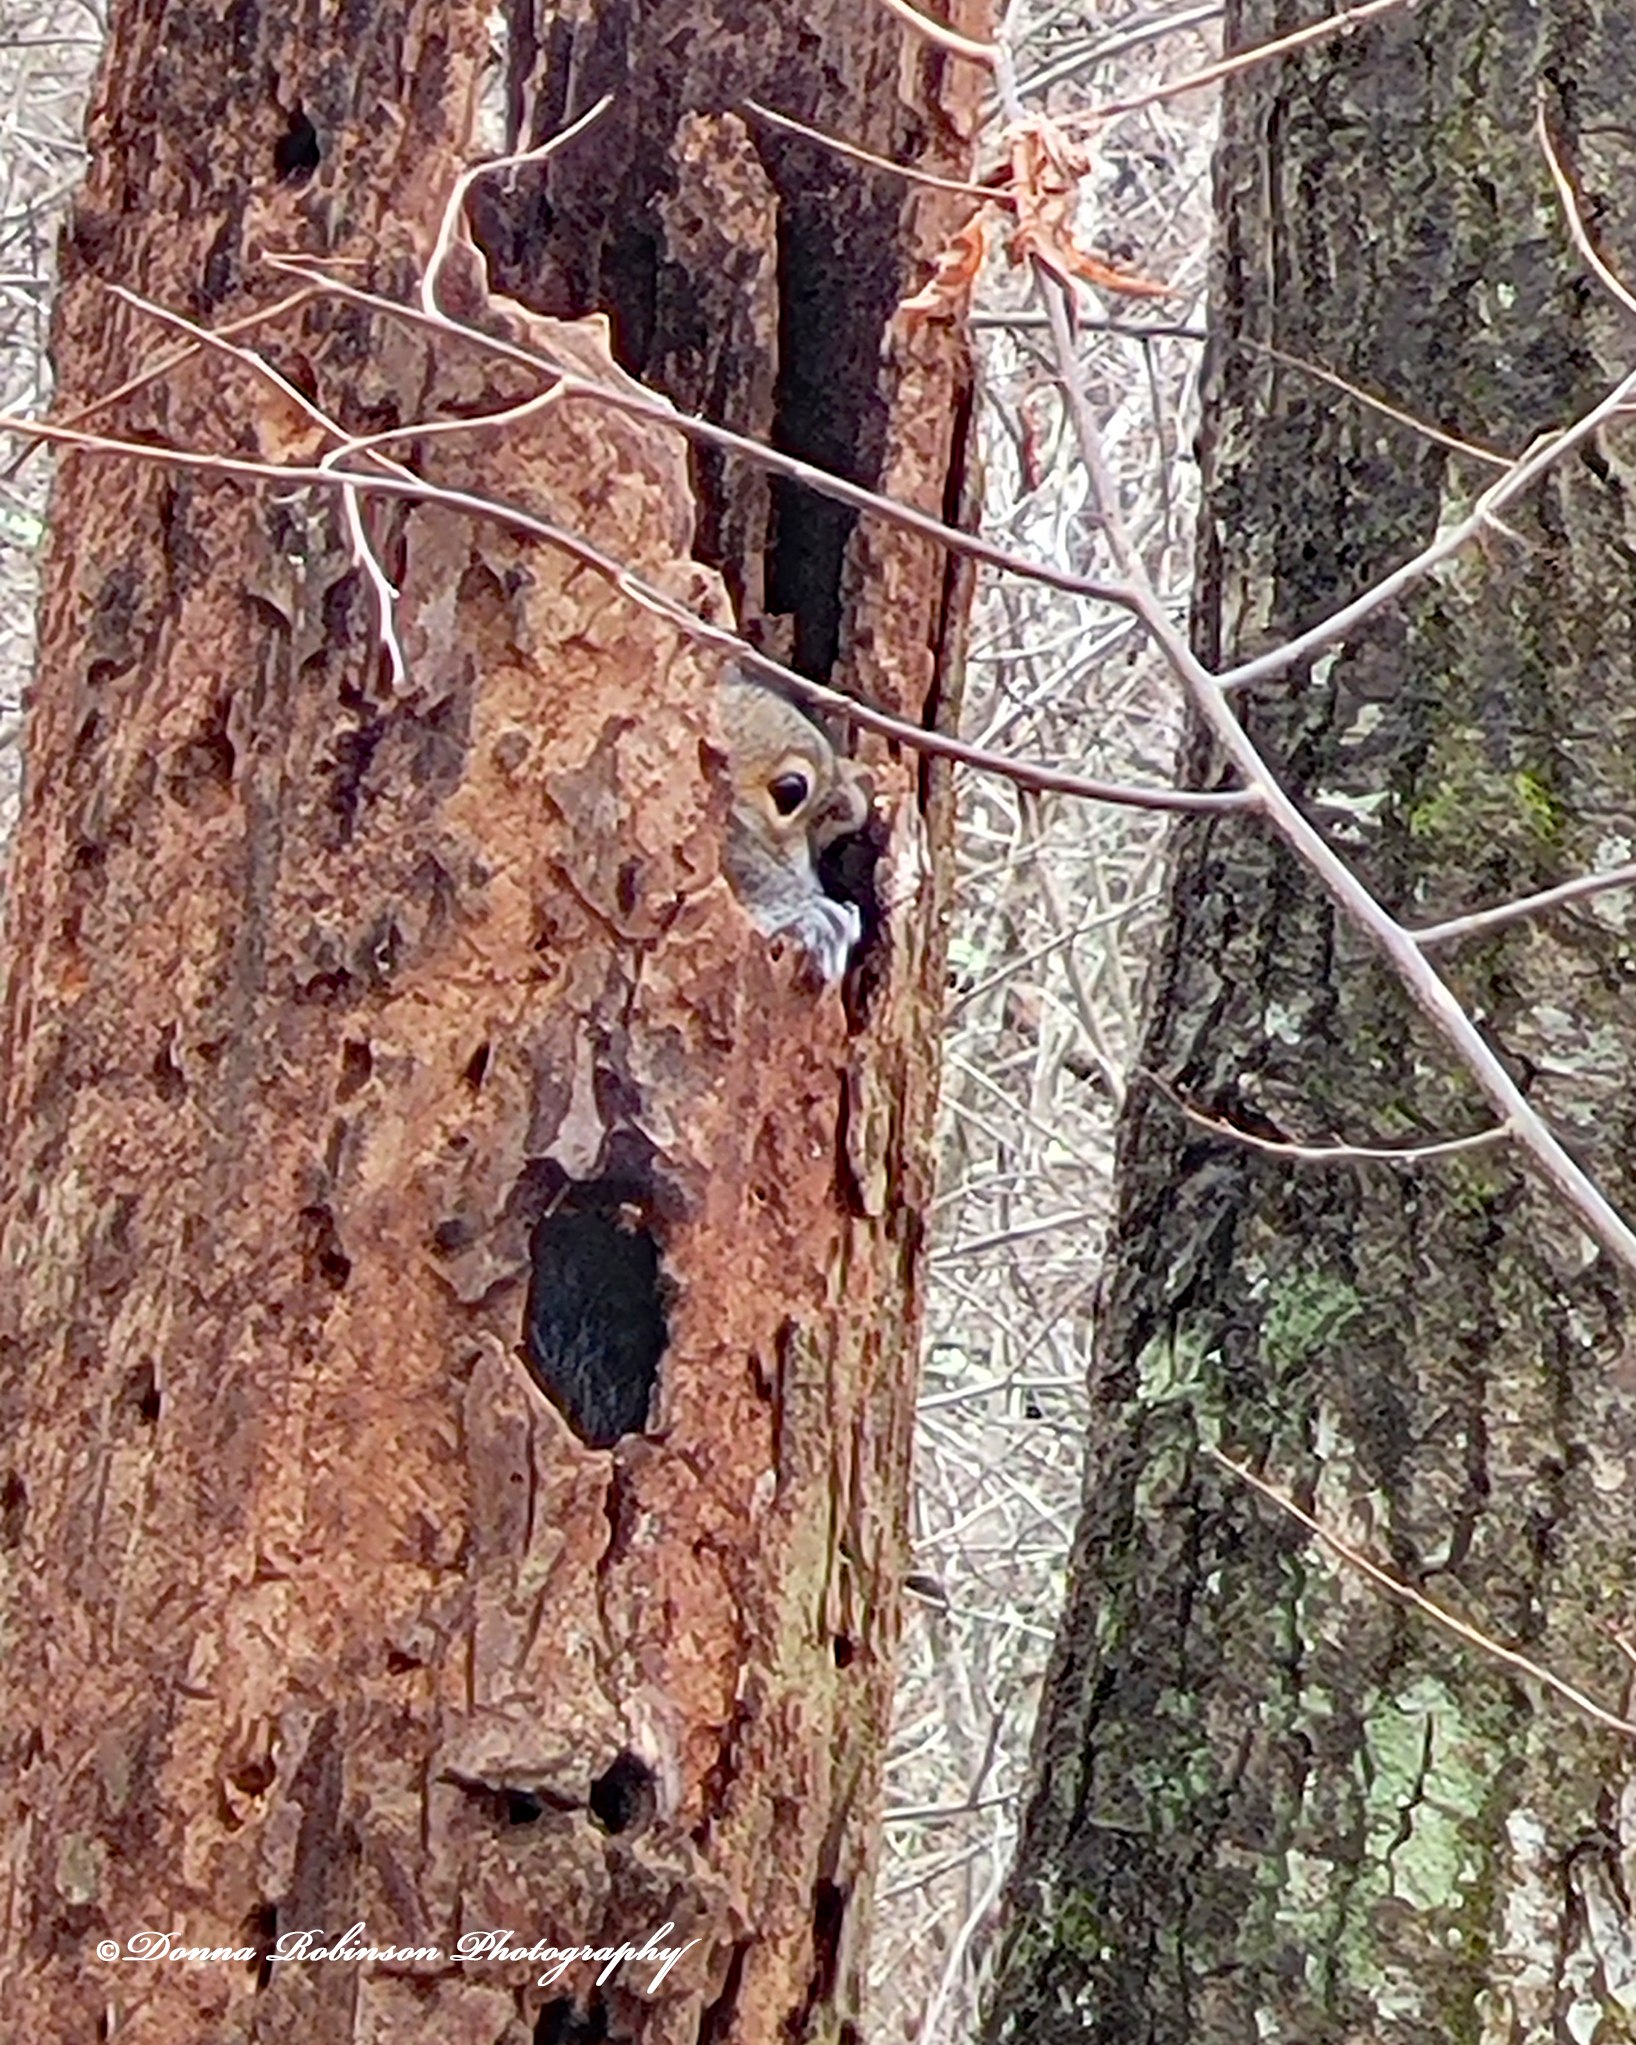
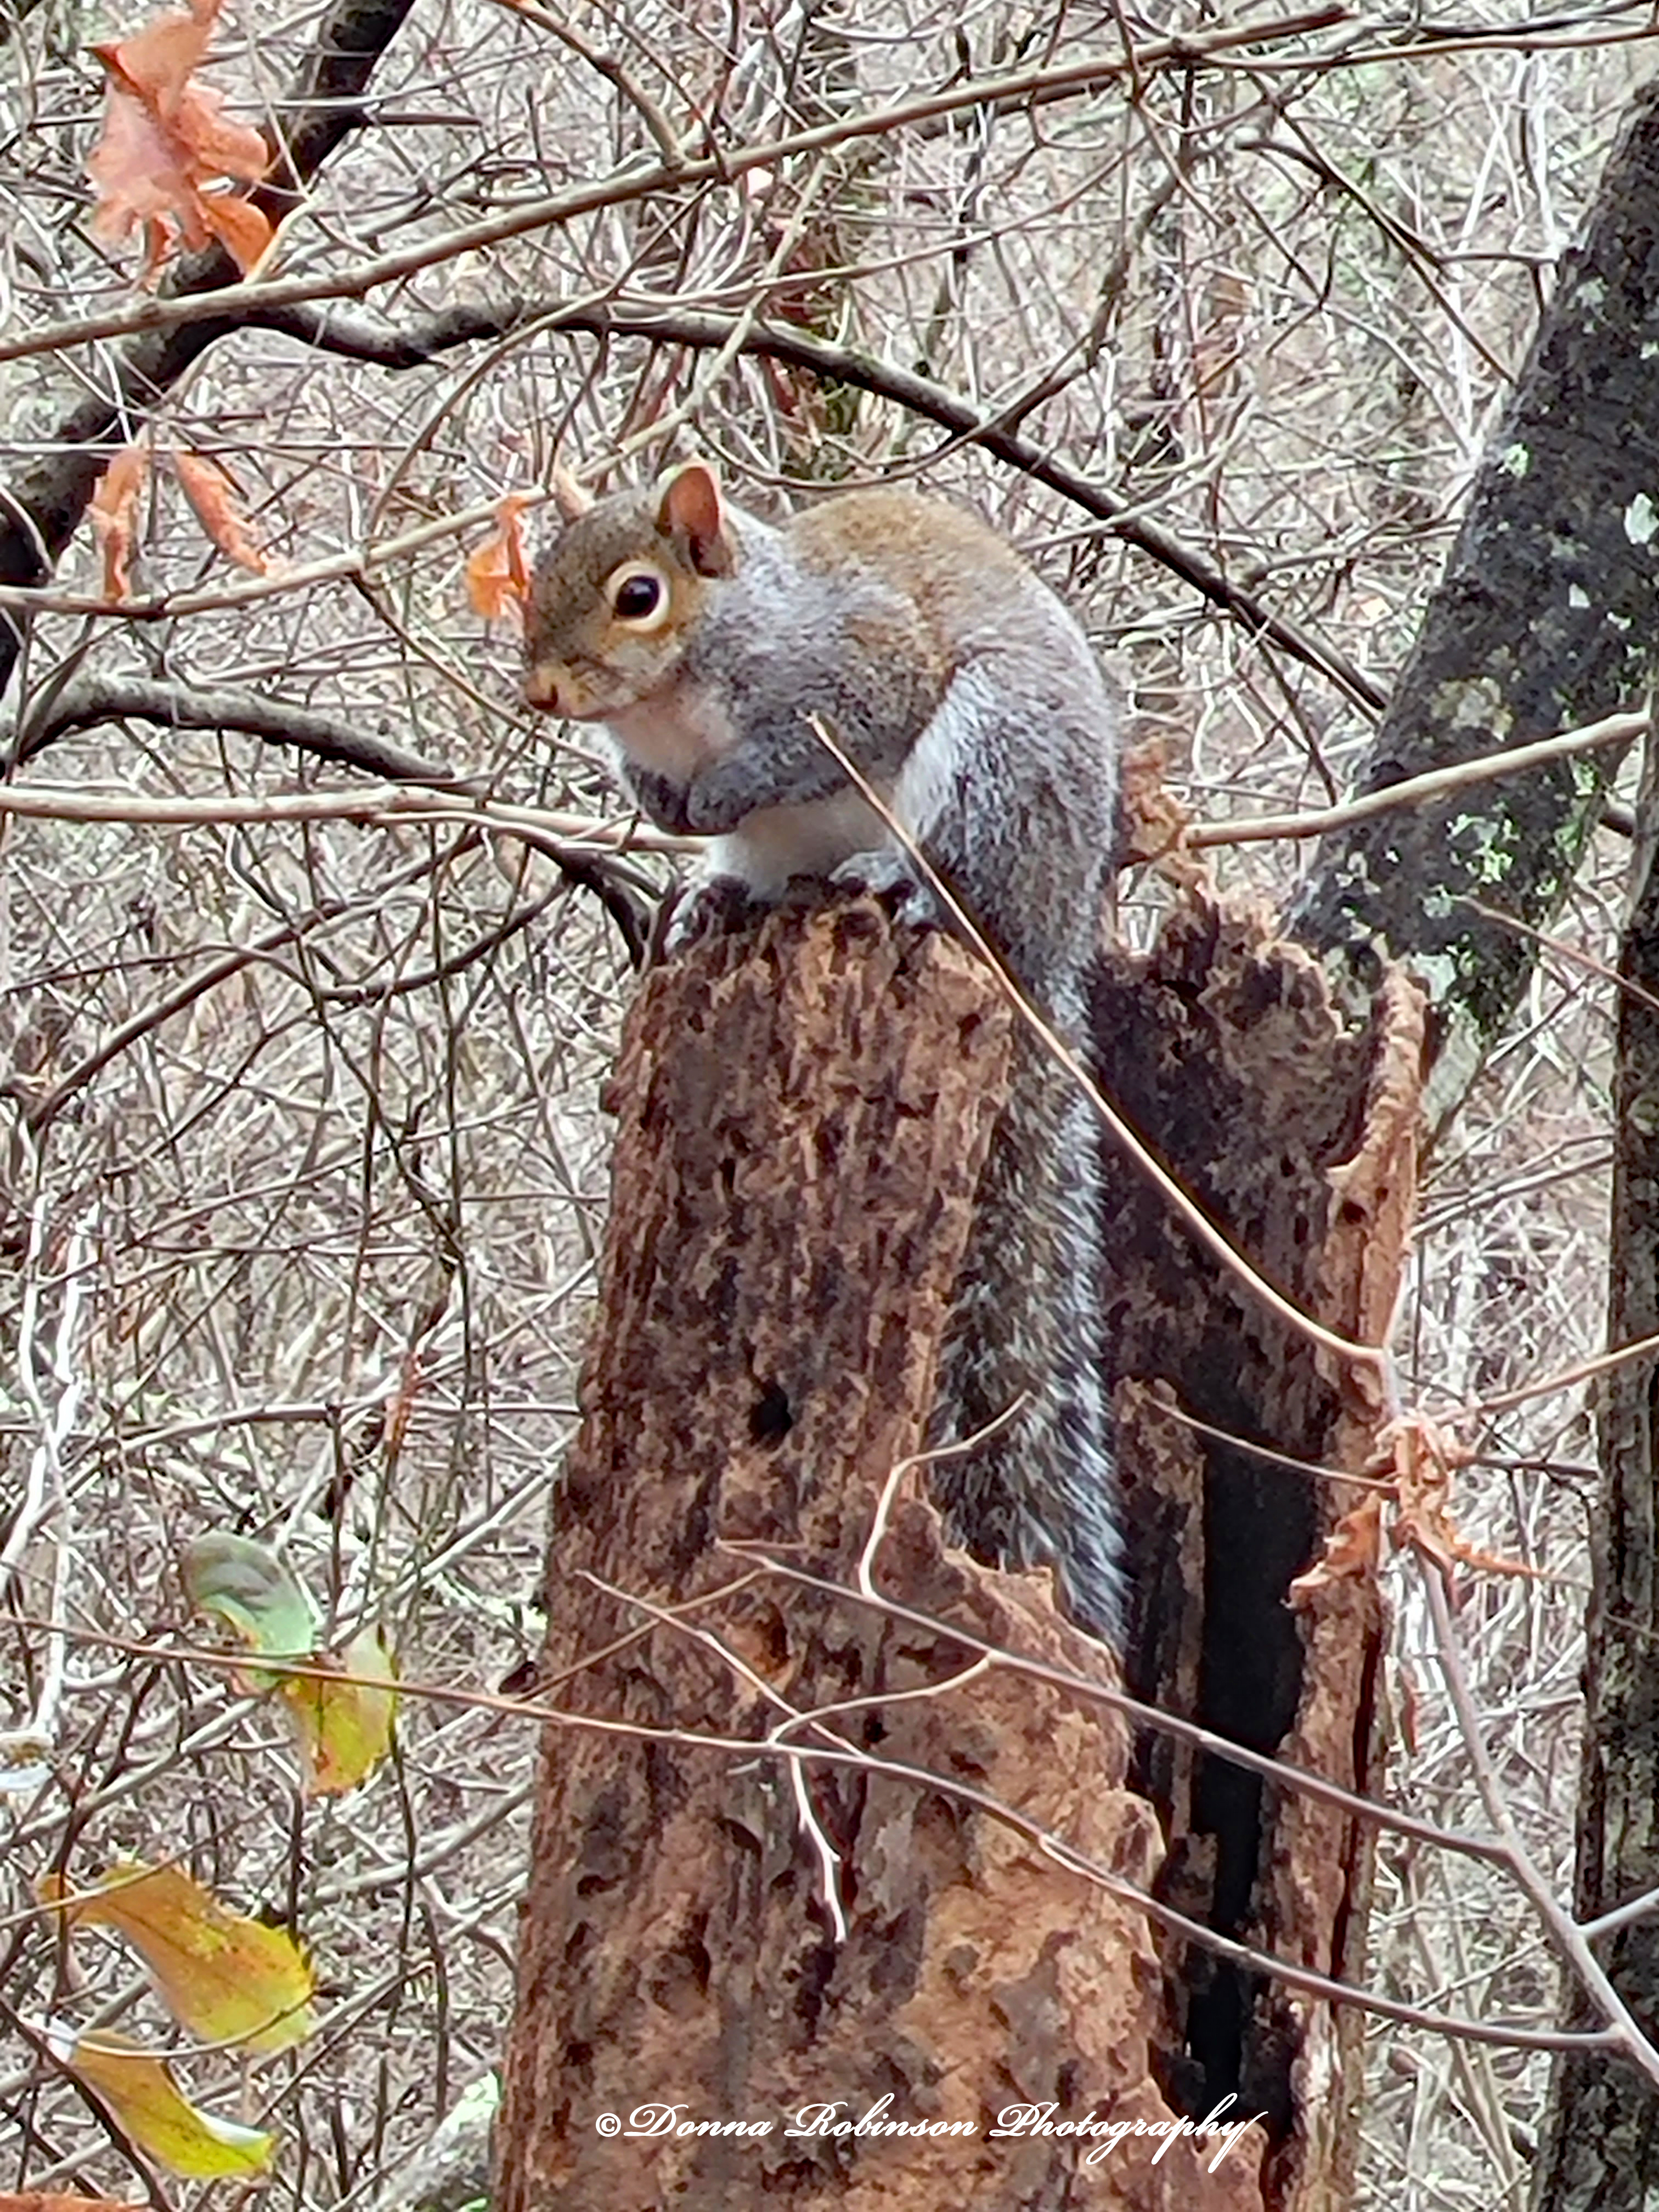
We’re beginning to realize that we never know what we’re going to see on our daily walks. Last week, as we were making a turn on the path, I noticed something (I wasn’t quite sure what at first) moving around, slightly peeking in an out of a hollow tree.
As we drew closer to the tree, Michael and I slowed down so as not to startle the critter and to get a better look at just what it was. If you guessed a squirrel, you would be correct. This little fella wasn’t the least bit scared of us, so I was able to snap off a few shots of him (or her), slowly coming out of its hiding place.
I was able to get one last shot of this cutie coming out of the tree, stopping for a brief second, before he decided to scamper off.
About the images. I used my Samsung Galaxy 20 Note and only did a little editing in Photoshop. A quick haze removal, slight saturation adjustment and some cropping is all these photos needed. I was surprised that I didn’t need to add any sharpness (except for the feature photo) after cropping.
Our walks are fun and as I mentioned earlier, we never know what we’ll see/discover.
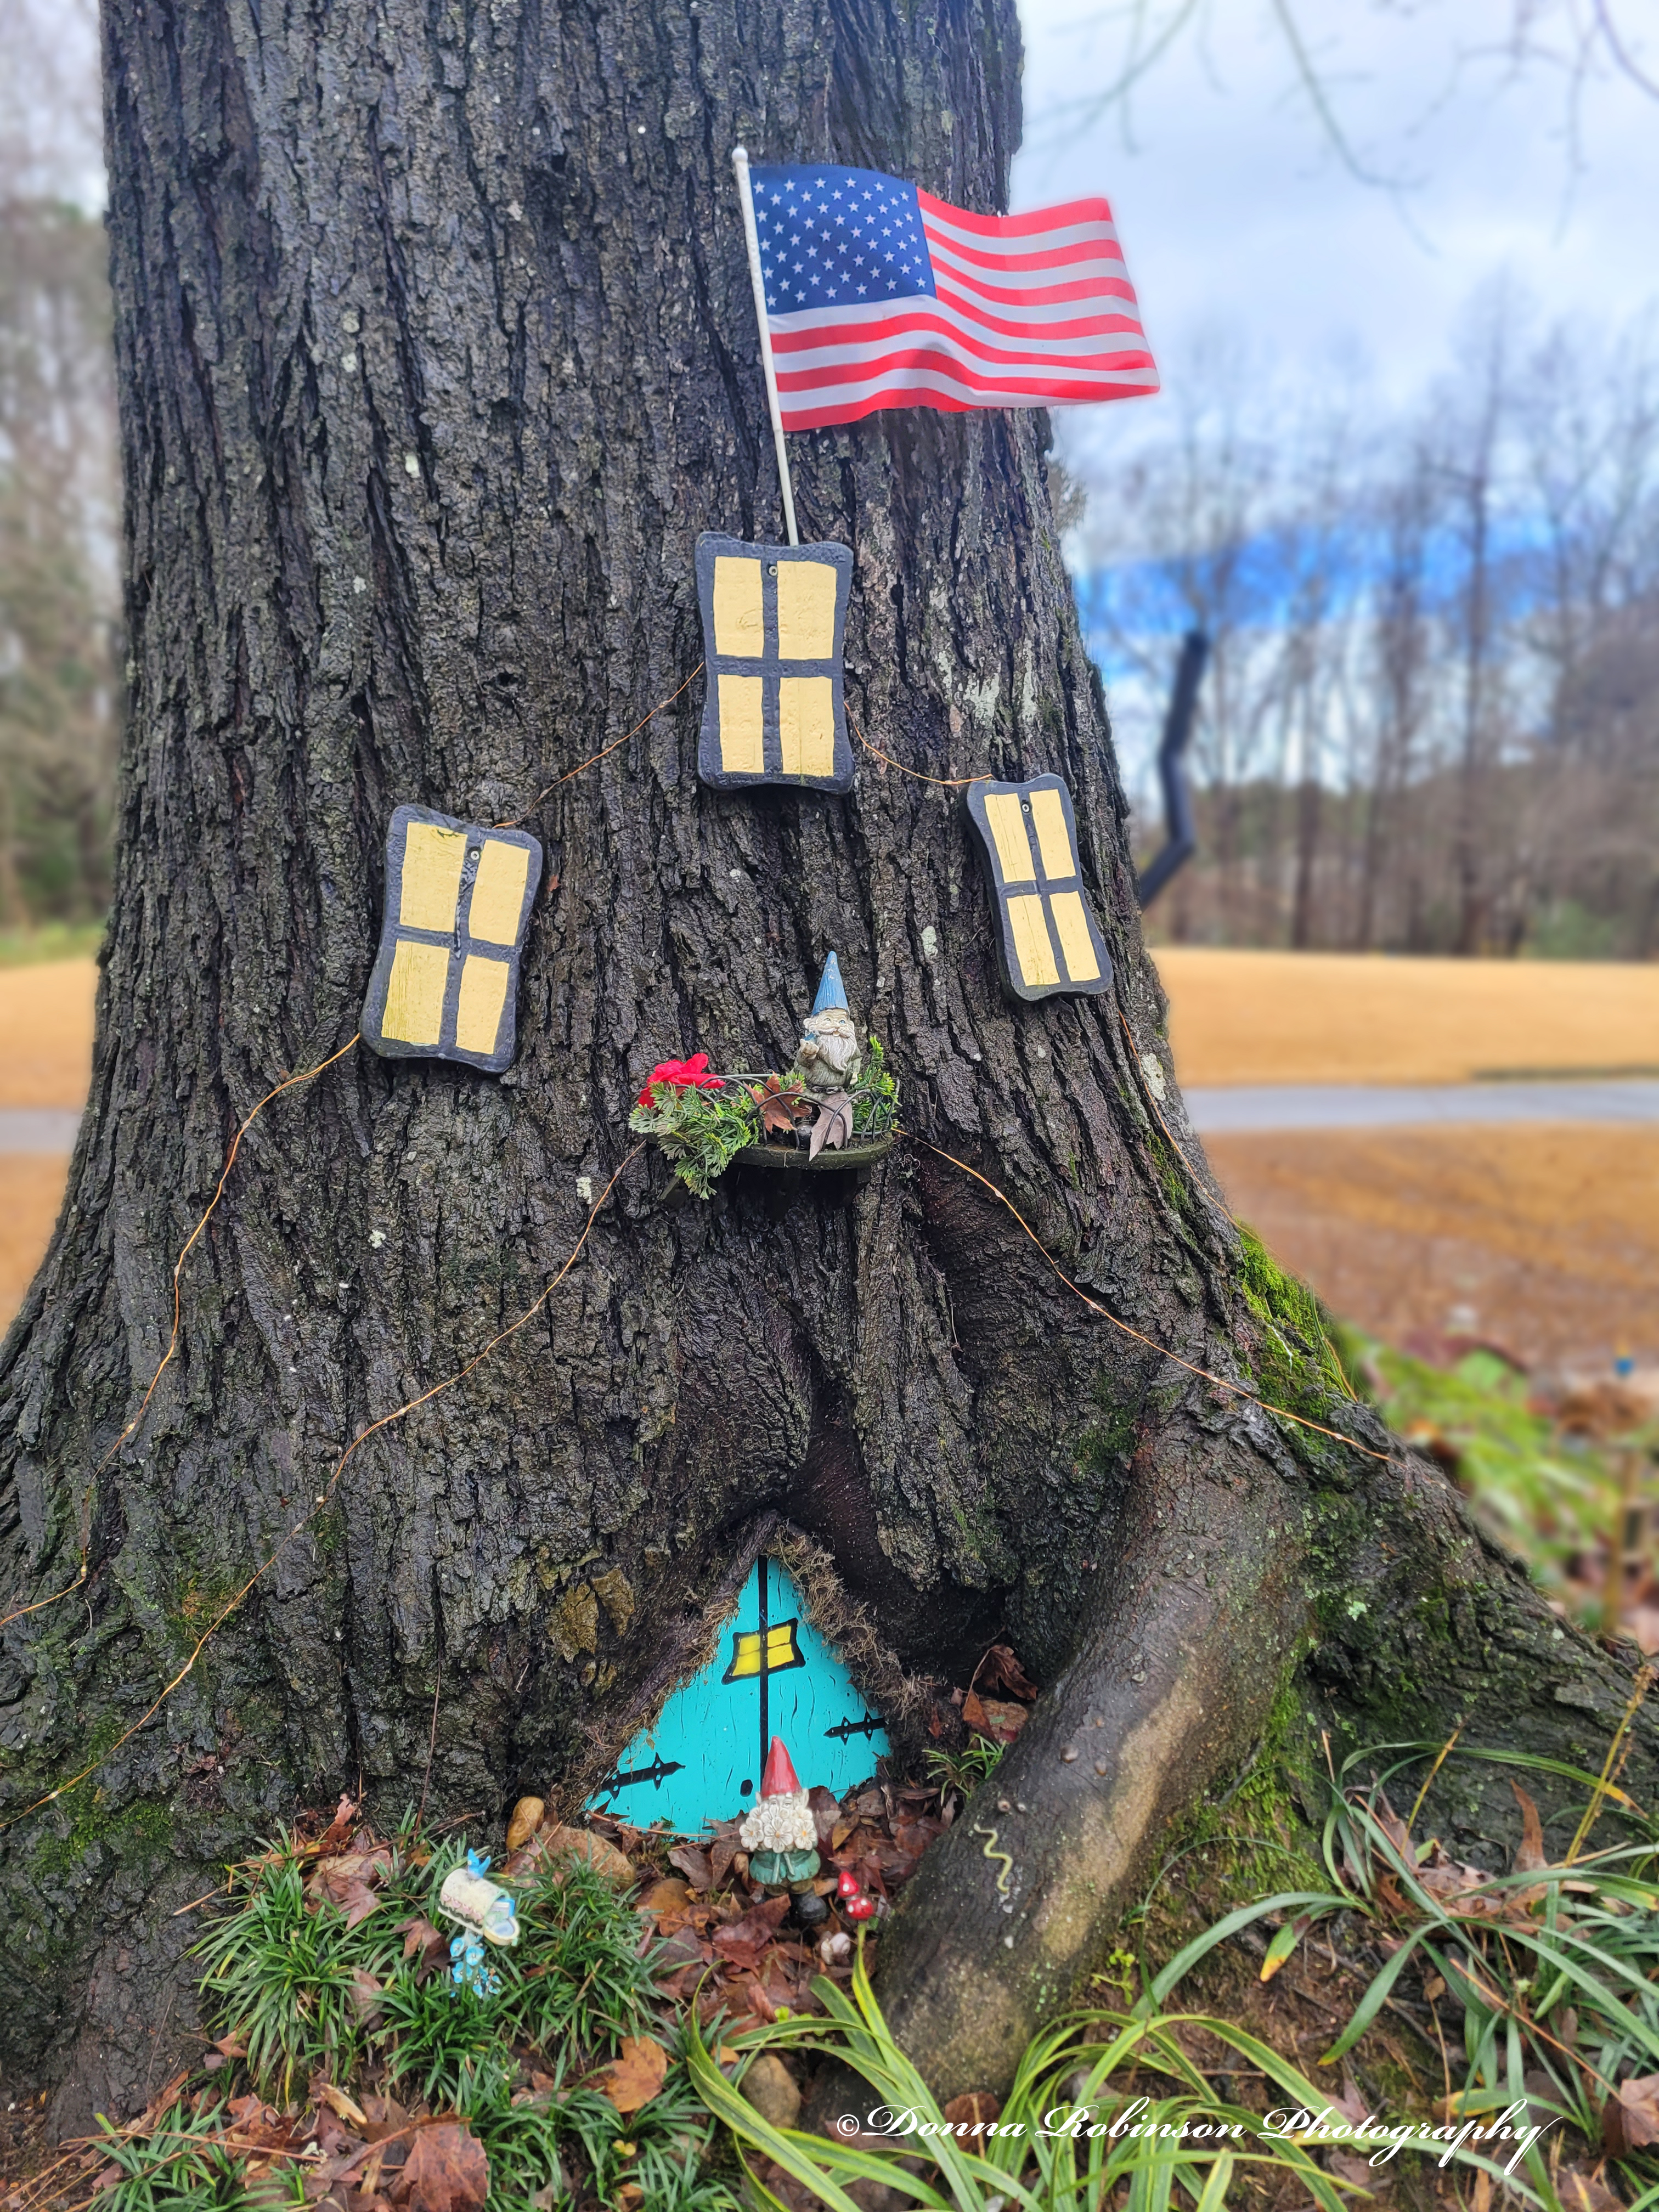
Michael and I have found a great walking path near our new home. It’s on a golf cart path that meanders through the natural habitat of Flat Creek, several neighborhoods and a golf course. About halfway through our 8 – 10-mile walk is the cutest gnome village that someone strategically (and very creatively) placed around the base of a tree. It sits just off a golf cart path between the 10th and 11th holes, so you can’t help but to stop and look, whether you’re walking or playing golf!
I’m not one to carry my camera with me on our daily walks, so I pulled out my Samsung Galaxy 20 to capture the focal point of the make-believe village. It was an overcast day, so I brought it into Canon Digital Professional to pump up the lighting and saturation a little. I then brought it into Photoshop for cropping and blurring the background.
What really drew me to this village was the detail the creator went to, in making this door and having it perfectly fit within the trunk of the tree! Notice how they also placed the gnome (one can only assume the lead gnome😉), tiny mushrooms, a snail and a mailbox. Again, the creator went to great lengths with their imagination!
I’ve recently taken more photos of the rest of this little village, so stay tuned for Part II of “Mystical Gnome Village” 😉
Ritva leads this week and boy does she have us stepping out of our comfort zone, but in a fun way. In her challenge she has us exploring abstract photography and in her words “breaking the rules of realism.”
“If you obey all the rules, you miss all the fun!”
_Katherine Hepburn
There’re quite a few ways to create abstract photography whether “in camera” or through the editing process. I thought I would share with you some images I took “in camera.”
In this first image I had read about a technique placing a baggie (or plastic wrap) over the lens to give a soft, moody kind of feel. To experiment with this technique, I shot a matted 5 x 6 photo. When I added the baggie over the lens and reshot the photo it produced an even more “antique-ish” kind of feel. It’s almost like the photo was so old that it was beginning to fade away.
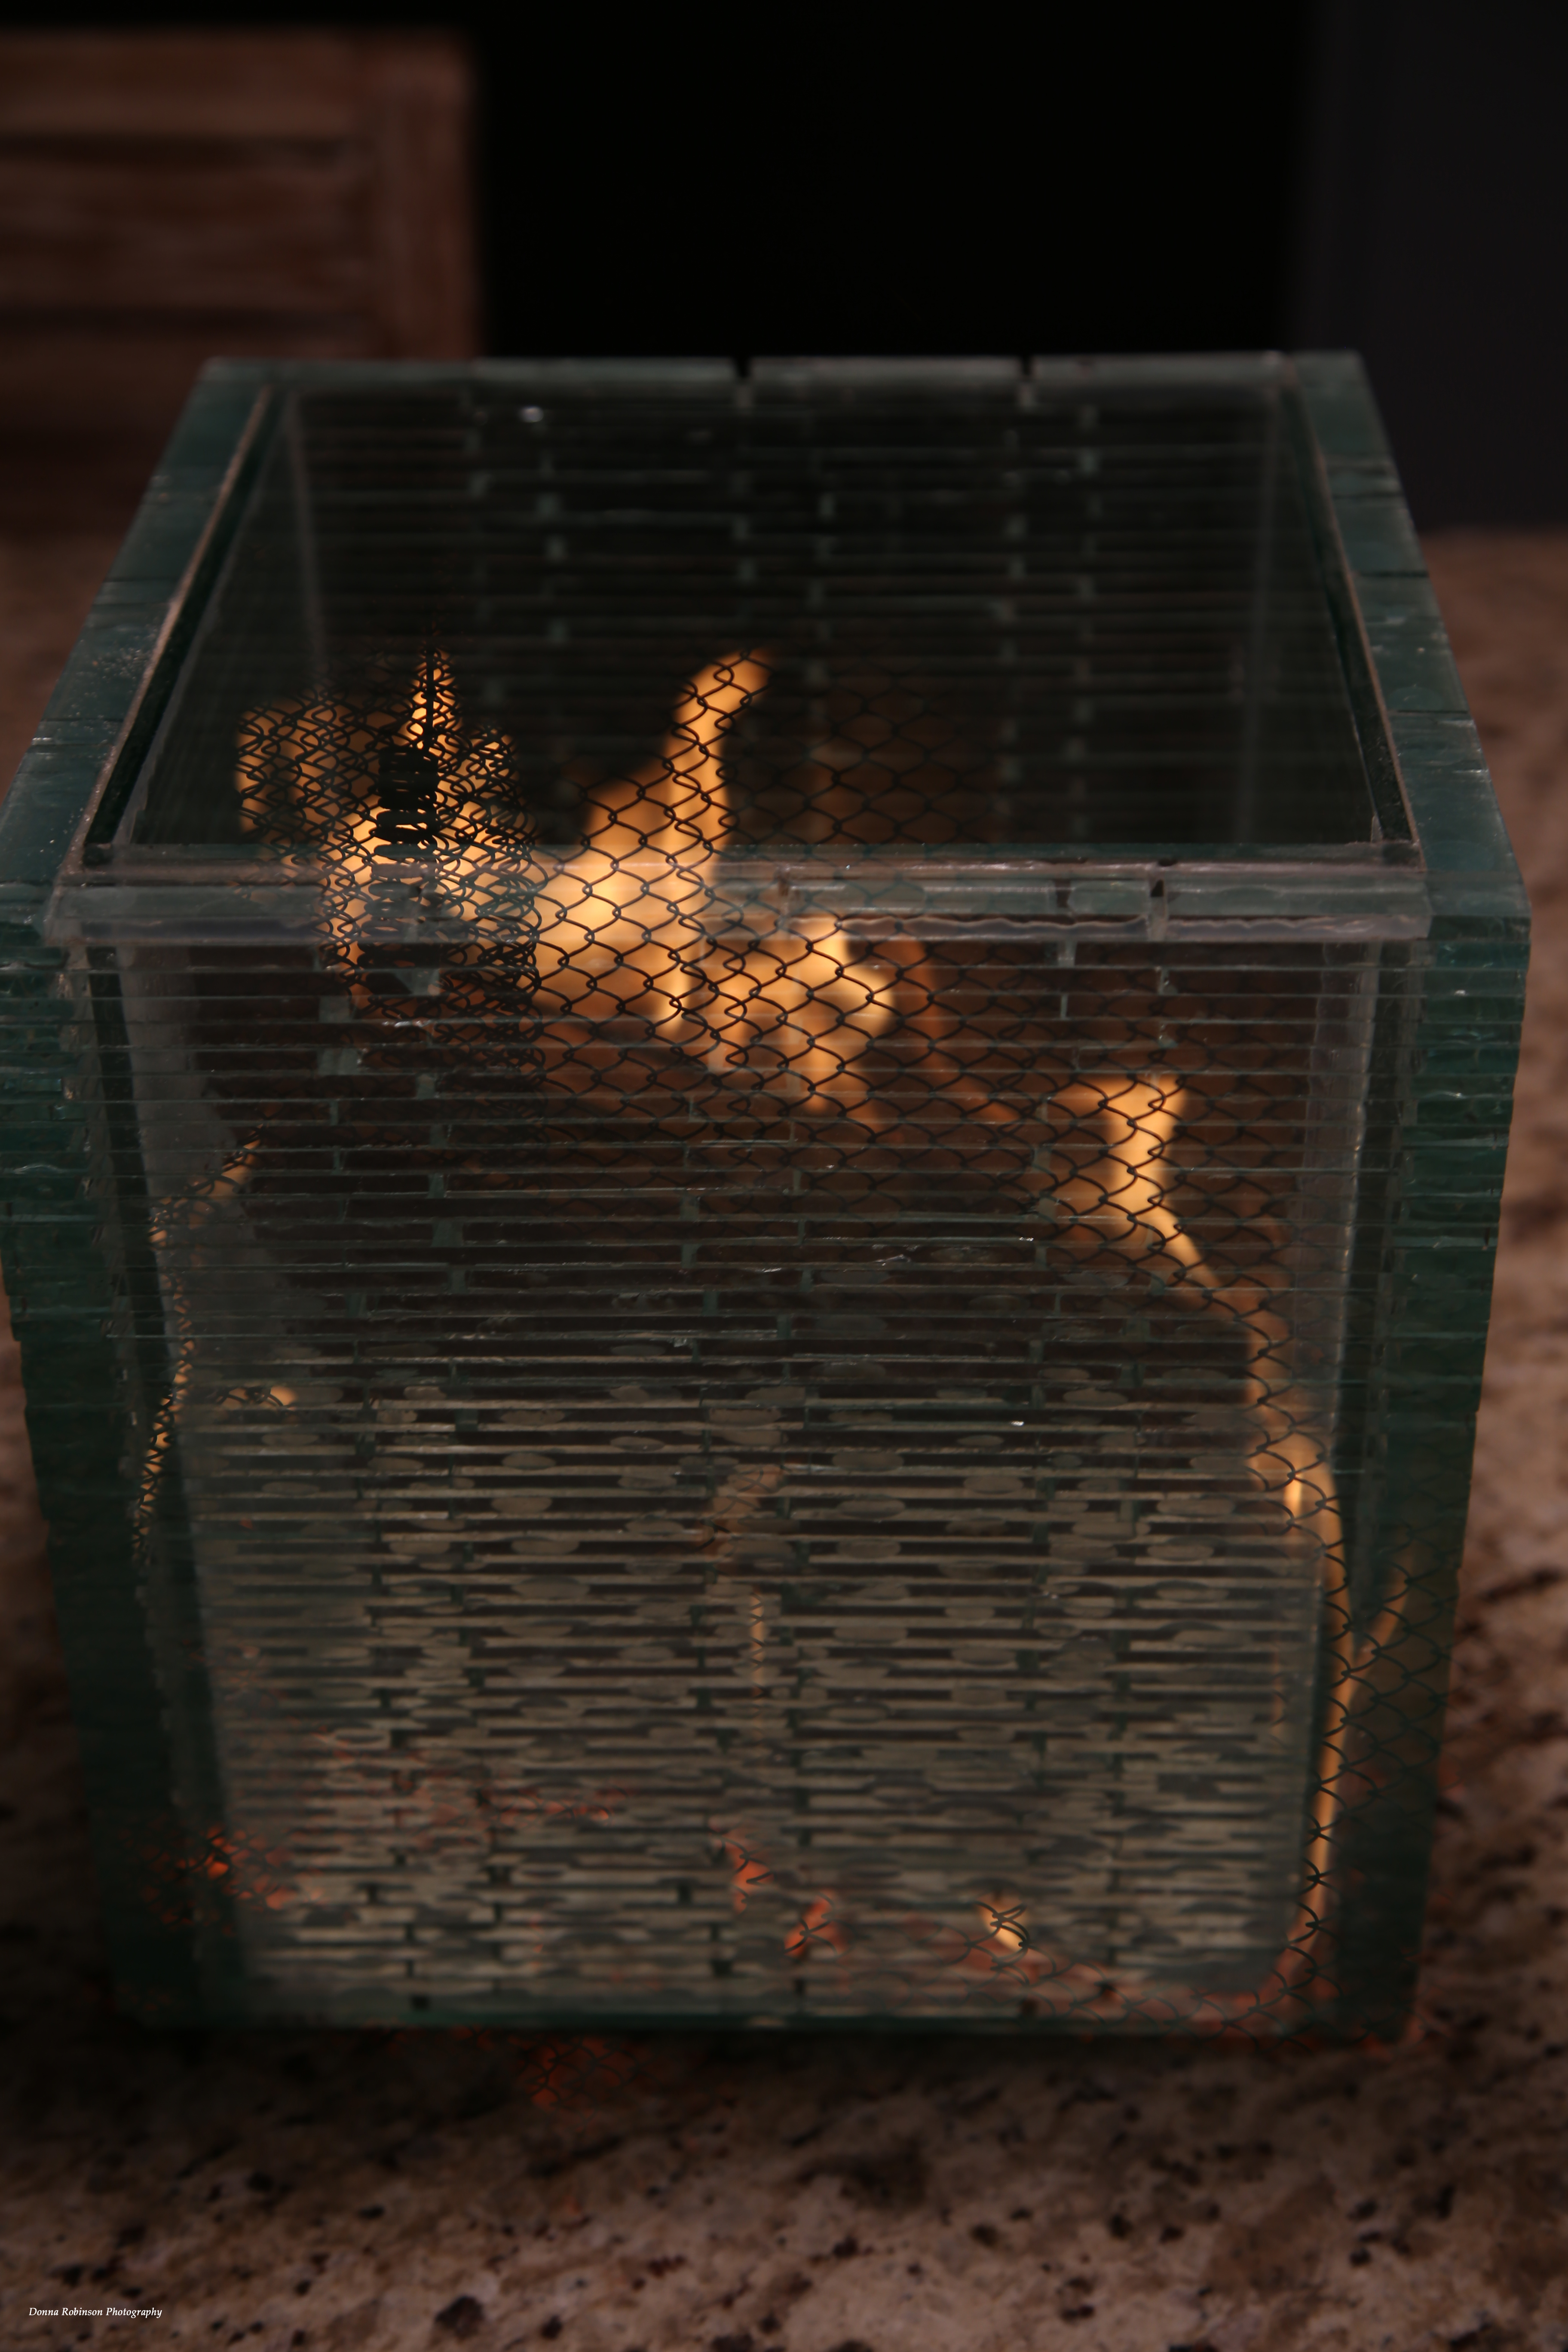
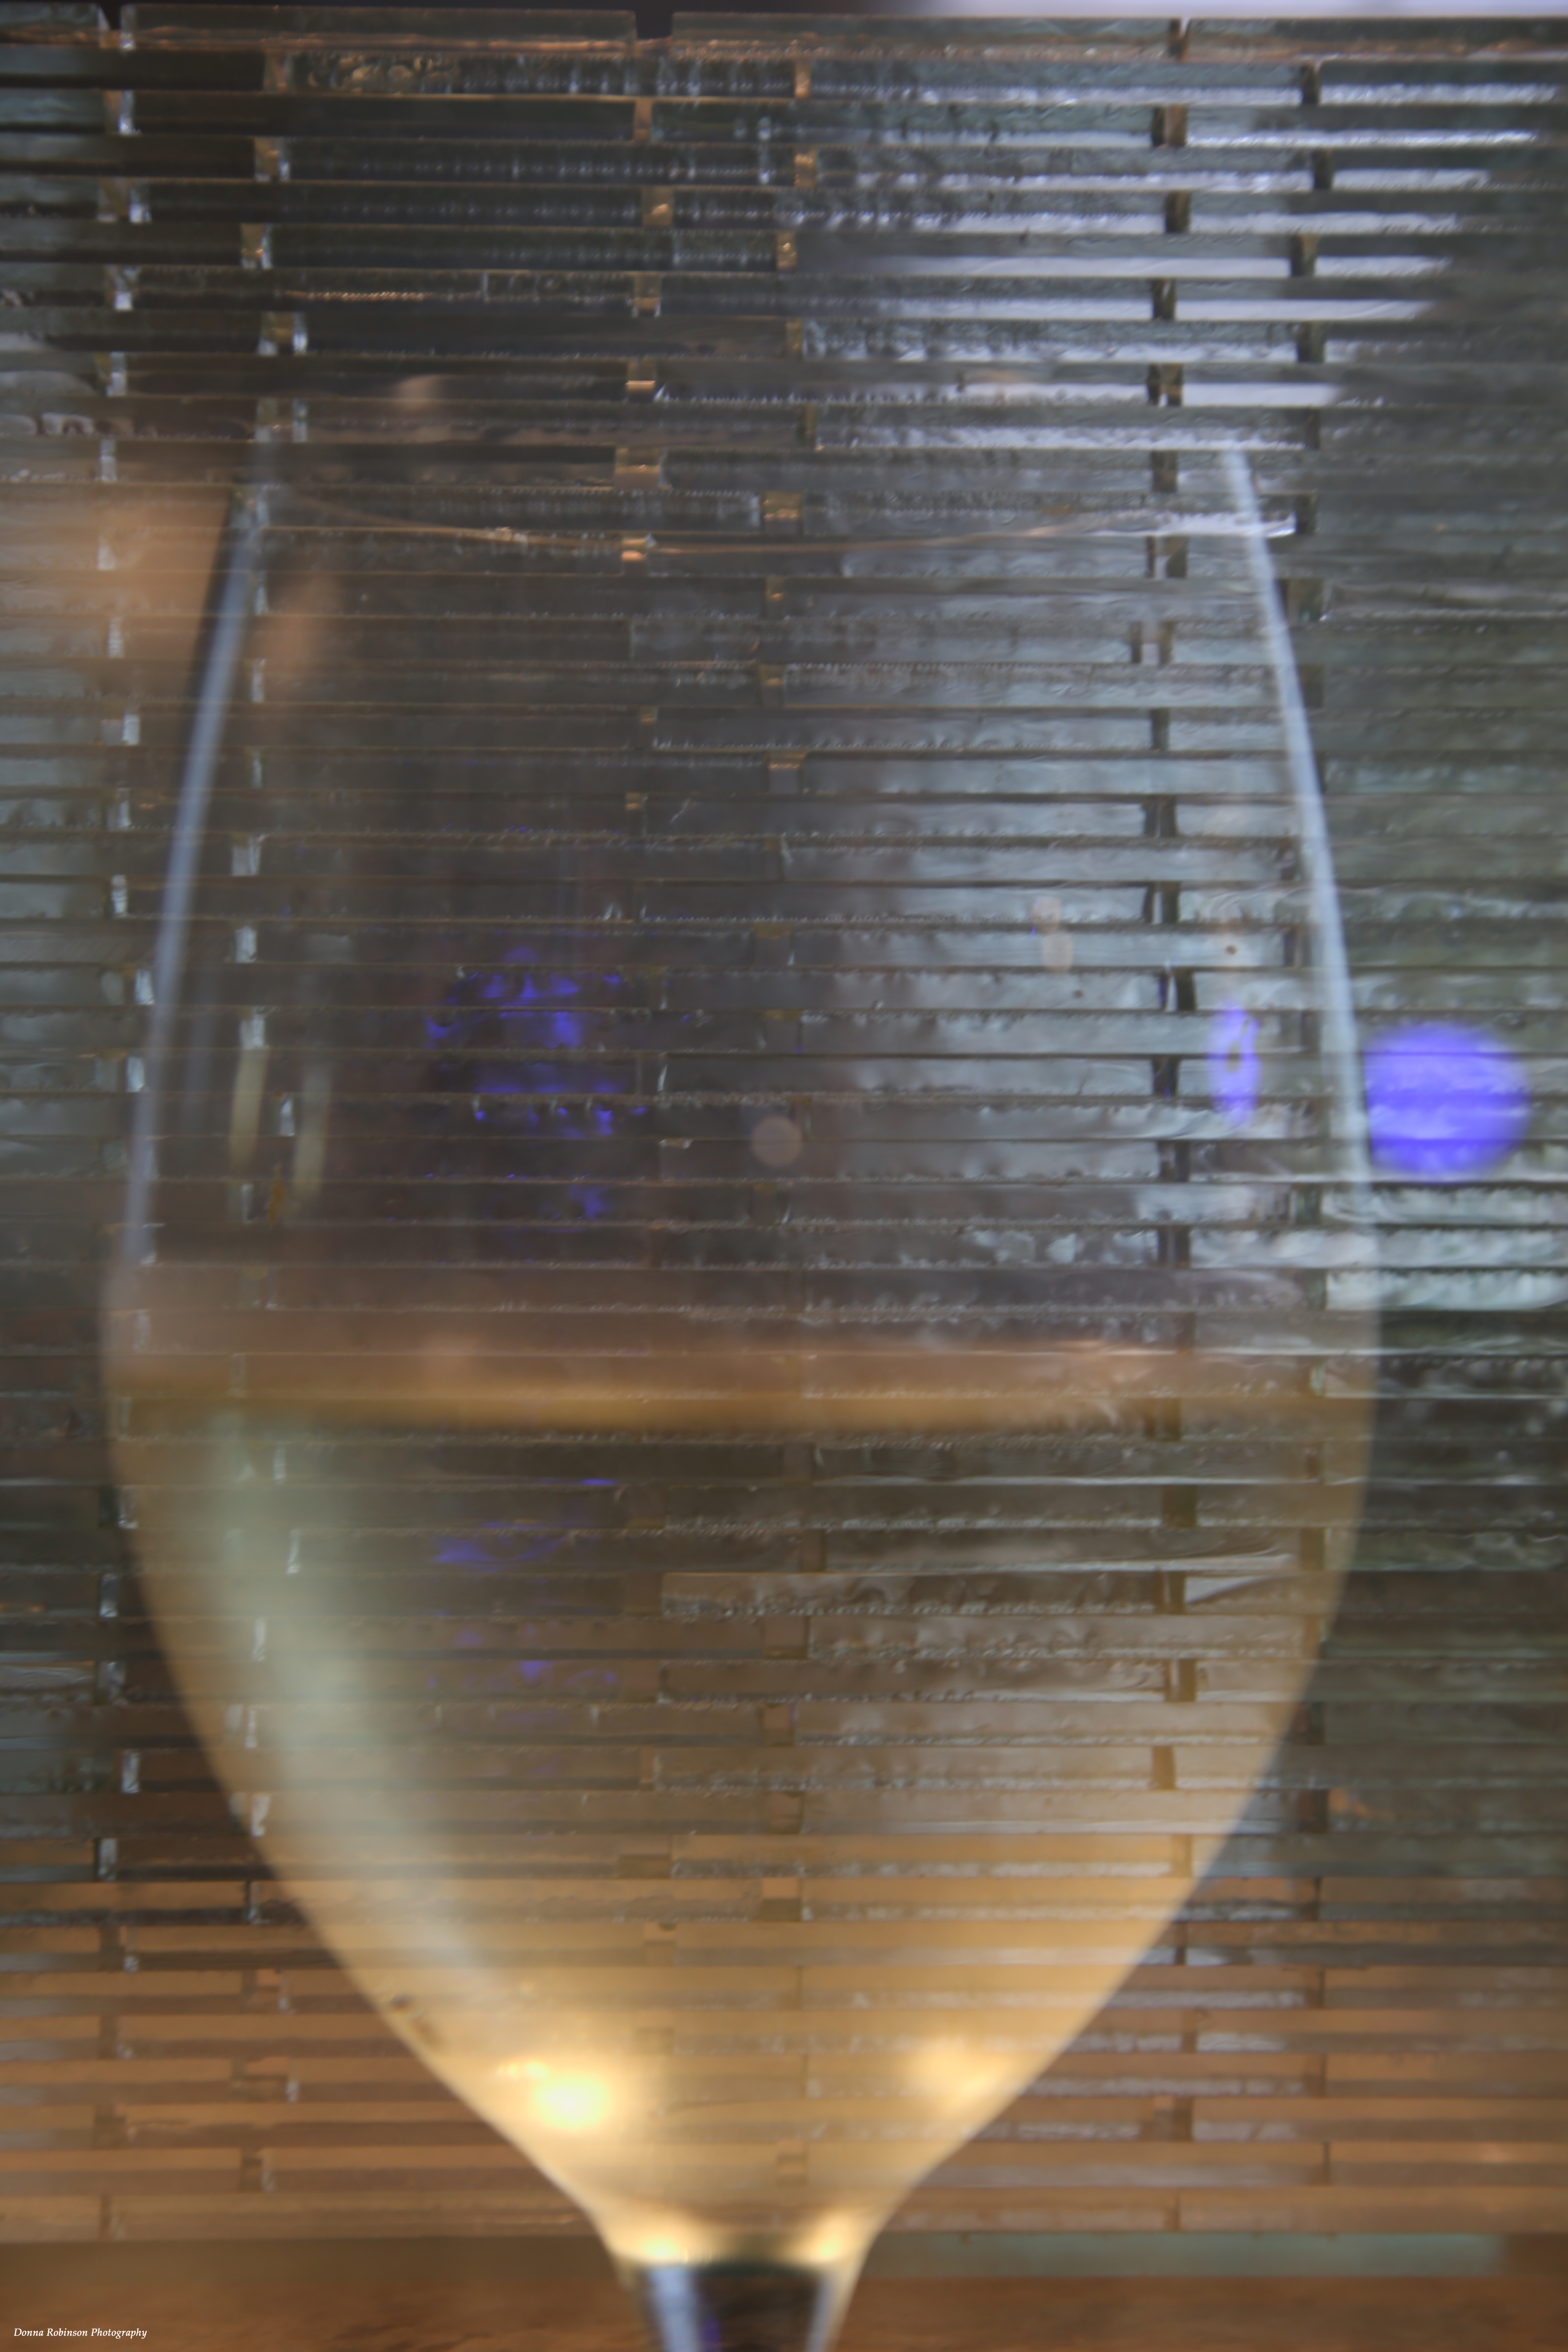
With the images below I used the “multiple exposure” setting in my Canon EOS 6D. It’s a VERY cool setting that allows you to take up to 9 different images and the camera will merge them together. I’ve only tried it with two (2) images so far.
Fire in Glass VaseYellow Daisy Floating in Bird BathChardonnay in Glass Vase
Another fun “in the camera” technique is “zooming.” A tripod or really steady hand is very helpful with this technique because as you’re using a slow shutter speed (i.e 1/5 th – 1/8th ) and as you’re taking the picture, you’re rapidly turning the lens to achieve the effect you want. Of course, you can also achieve this in Photoshop, but it’s pretty fun to challenge yourself with the camera.
Loquat BloomHavanna Cuba Acrylic PaintingBird Seed
The possibilities are limitless in creating abstract photography. It just depends on the story you’re trying to tell through your image as to what abstract technique you want to use.
Thank you Ritva for this fun and creative challenge. If you’re joining in on this challenge, be sure to link to Riva’s post in the “comments” section and also use the Lens-Artist tag.
Next week Egídio is hosting. He has some amazing photography so be sure to subscribe to his blog Through Brazilian Eyes.
This week’s Lens Artist Challenge, hosted by John, leads us down the path of examining how we edit our photos. As photographers we don’t just take a photo of what we see with our eyes, but oftentimes we take photos of what we see the end result to be. Are you with me?
I haven’t had much time behind the lens lately, so instead of going back through my library of images, I decided to get outside in our garden. I mean, what better way to share my before and after process than taking pictures in real time?!? So, here it goes.
Each of my examples were shot in RAW and first brought into the Canon Digital Professional Editing tool. There I could more accurately adjust the white balance and any other lighting/color tweaks. I’m sure I could do the same in Photoshop, but it’s what has worked for me over the years. Why fix what isn’t broke, right? I then brought all images into Photoshop to crop, make a few more minor color adjustments and apply copyright information.
Up first is one our many hydrangea shrubs. They are covered with buds this year and I’m excited to see their blooms come in. The top photo is my before shot to me it was just a little too much on the yellow green side.
In the Digital Professional editing tool, I warmed up the white balance with the temperature control and then I moved up the contrast slide a few notches and voila! The leaves are a much richer, deeper green with better definition of the veins on the leaves. Once I pulled it into Photoshop, I cropped it in to bring more focus to the cluster of buds.
Next up was our Dogwood tree. It has really given us a wonderful show of blossoms this year. I was almost a little too late in taking photos. Thankfully, I managed to get a few shots in before the next round of wind and rain blew more off the tree.
Here’s my first shot. I was using my macro lens to capture the detail of the flowers. Unfortunately, the sun was moving in and out of the clouds and I was having a hard time keeping my settings straight. Also, the wind caused a major battle in getting a sharp imagine. But, of all the images, this was the one which closely matched what I was envisioning.
In my after shot, I really like how the white balance temperature setting warmed up the darker tones of the petals and flowers. I was also able to brighten it up a little without blowing out the detail. Because I had done all the tweaking in the Digital Professional Editing tool, I only needed to crop it slightly once I brought it into Photoshop.
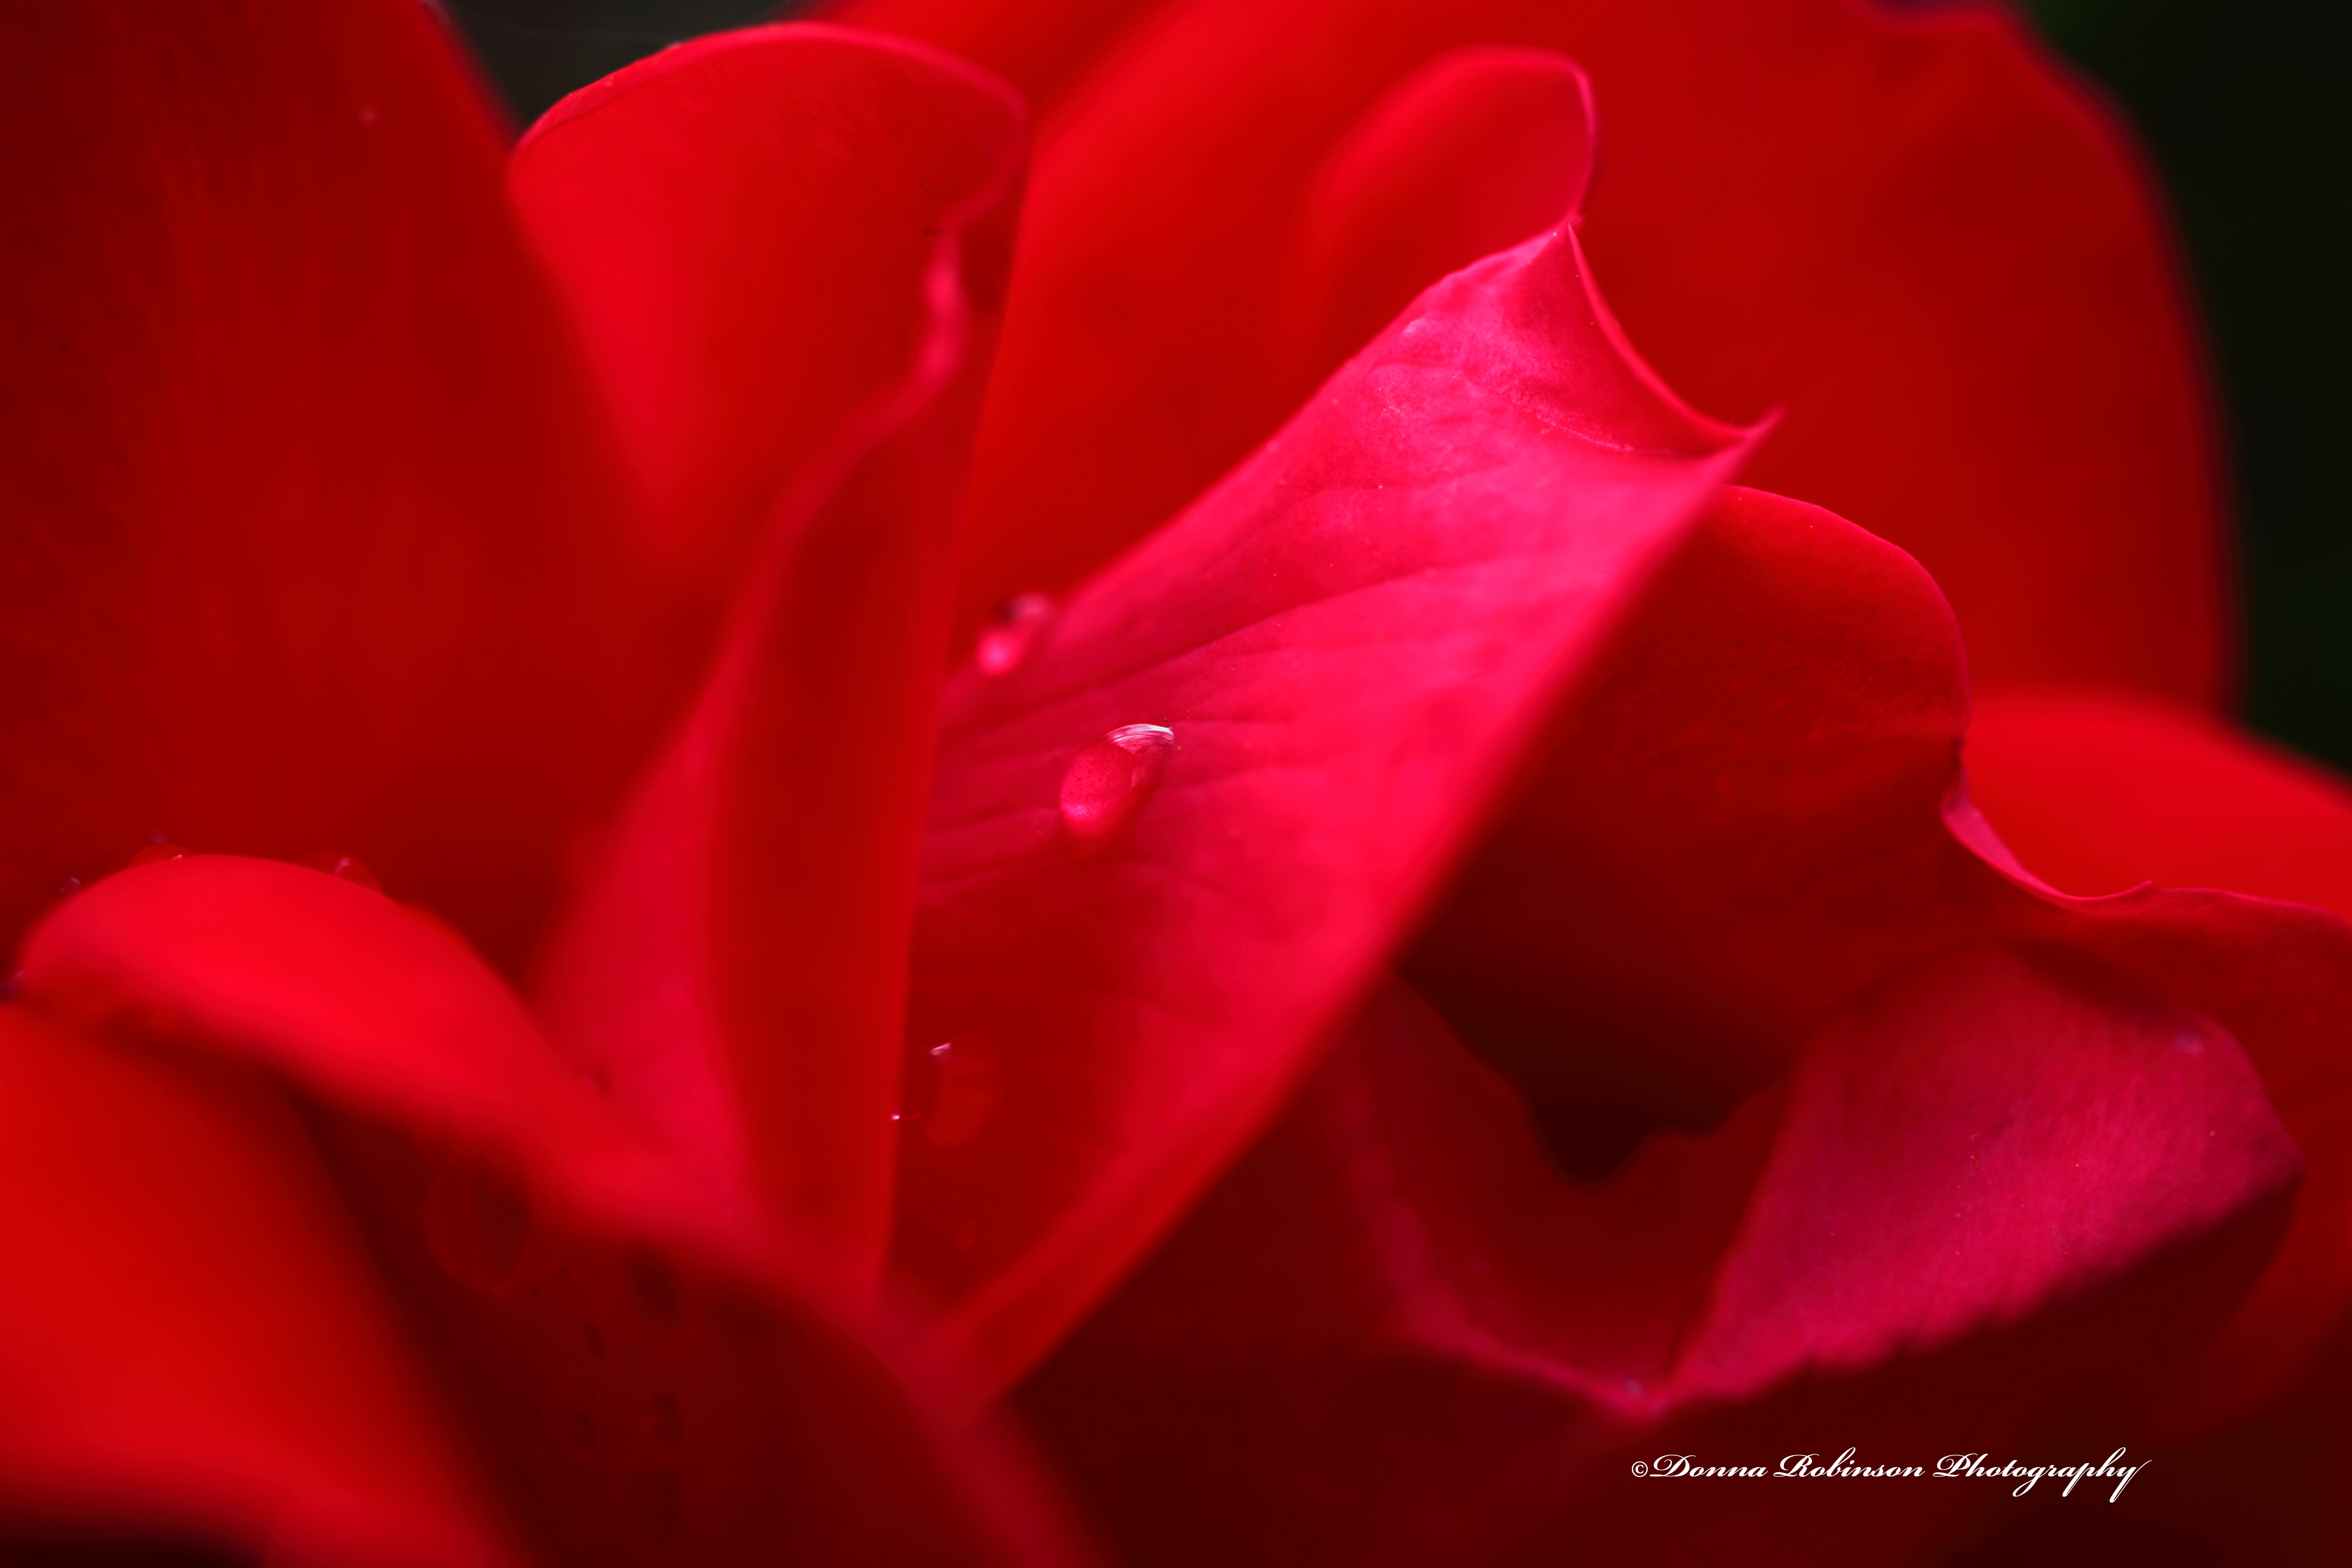
Last up in my garden tour is this rosebud. Once again, the sun and the wind were wreaking havoc on the shot (it’s a red rose, not a pink rose). Still using my macro lens, I wanted to get a better shot of one of the water droplets. That just didn’t work so I settled on a wider perspective of the various curves of the bloom.
Editing was a little challenging because to me the highlights were washing out the petals. But then I found an edit button “Linear” just under the “Contrast,” “Highlights,” and “Shadows” buttons. And just like that the entire image transformed into a beautiful red rosebud. Plus, the water droplet stands out!
But the highlight was still distracting to me. So, I went into the RGB tab and tweaked each individual color. Much better, but now it’s a little too dark.
One last little tweak and here’s the final image.
I hope you enjoyed my little tour of our garden and how I process my photos. It was nice to get outside and back behind the lens. Thank you, John for this week’s challenge.
Next week, Donna of Wind Kisses will host the challenge. You can also find more information here if you want to join the fun.
Saturdays are for getting out of the house. Some days we run errands, other days we get in the truck and pick a direction, North, South, East or West. And then there are days we do both. It’s all about getting out and away from the house and finding a fun place to have lunch.
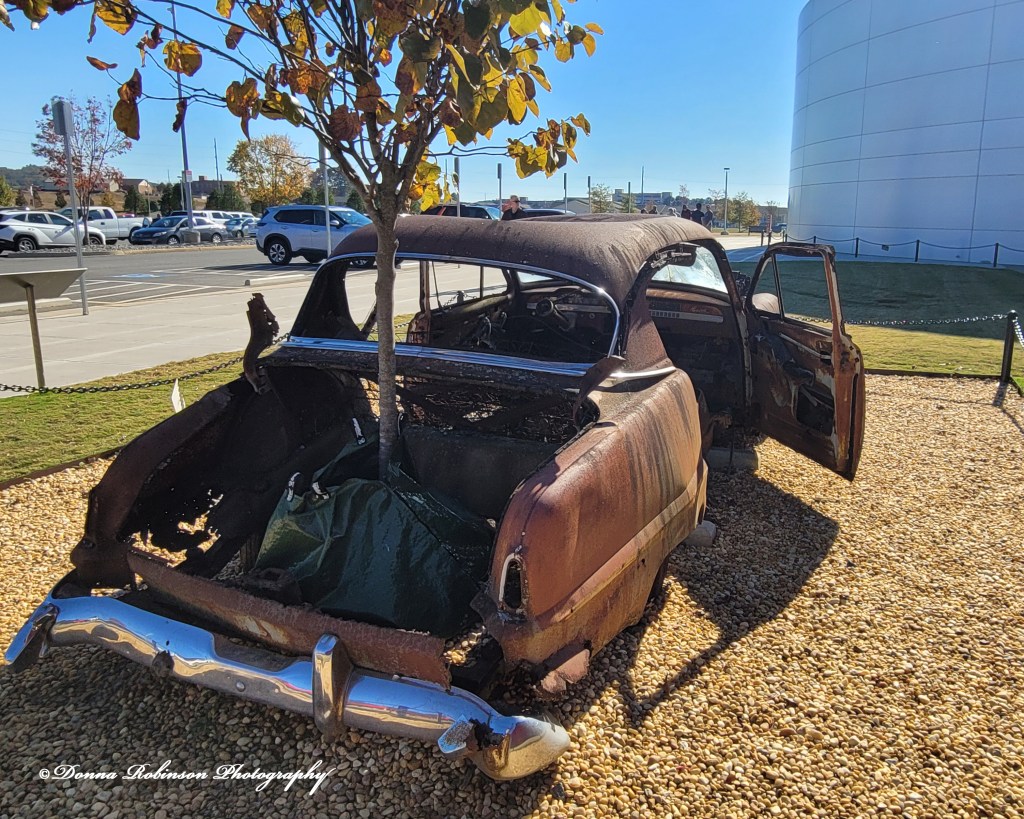
One recent Saturday we ran errands first and ended up in Cartersville, GA at the Savoy Automobile Museum. We have been there before, unfortunately this time I was without my camera. Big mistake, but oh well at least I had my Samsung Galaxy cell phone!
Today’s photo(s) is of a 1954 Plymouth Savoy. As the developers were clearing out the 35-acre lot for an unnamed museum, they uncovered this rusted-out shell of a car. Taking it as an omen, the Savoy Automobile Museum was born and the namesake, Savoy was preserved as part of the museum landscape.
If you’re into cars, I highly recommend you check out the Savoy Automobile Museum. They change their collections frequently and have some very interesting automobiles making the trip well worth it.
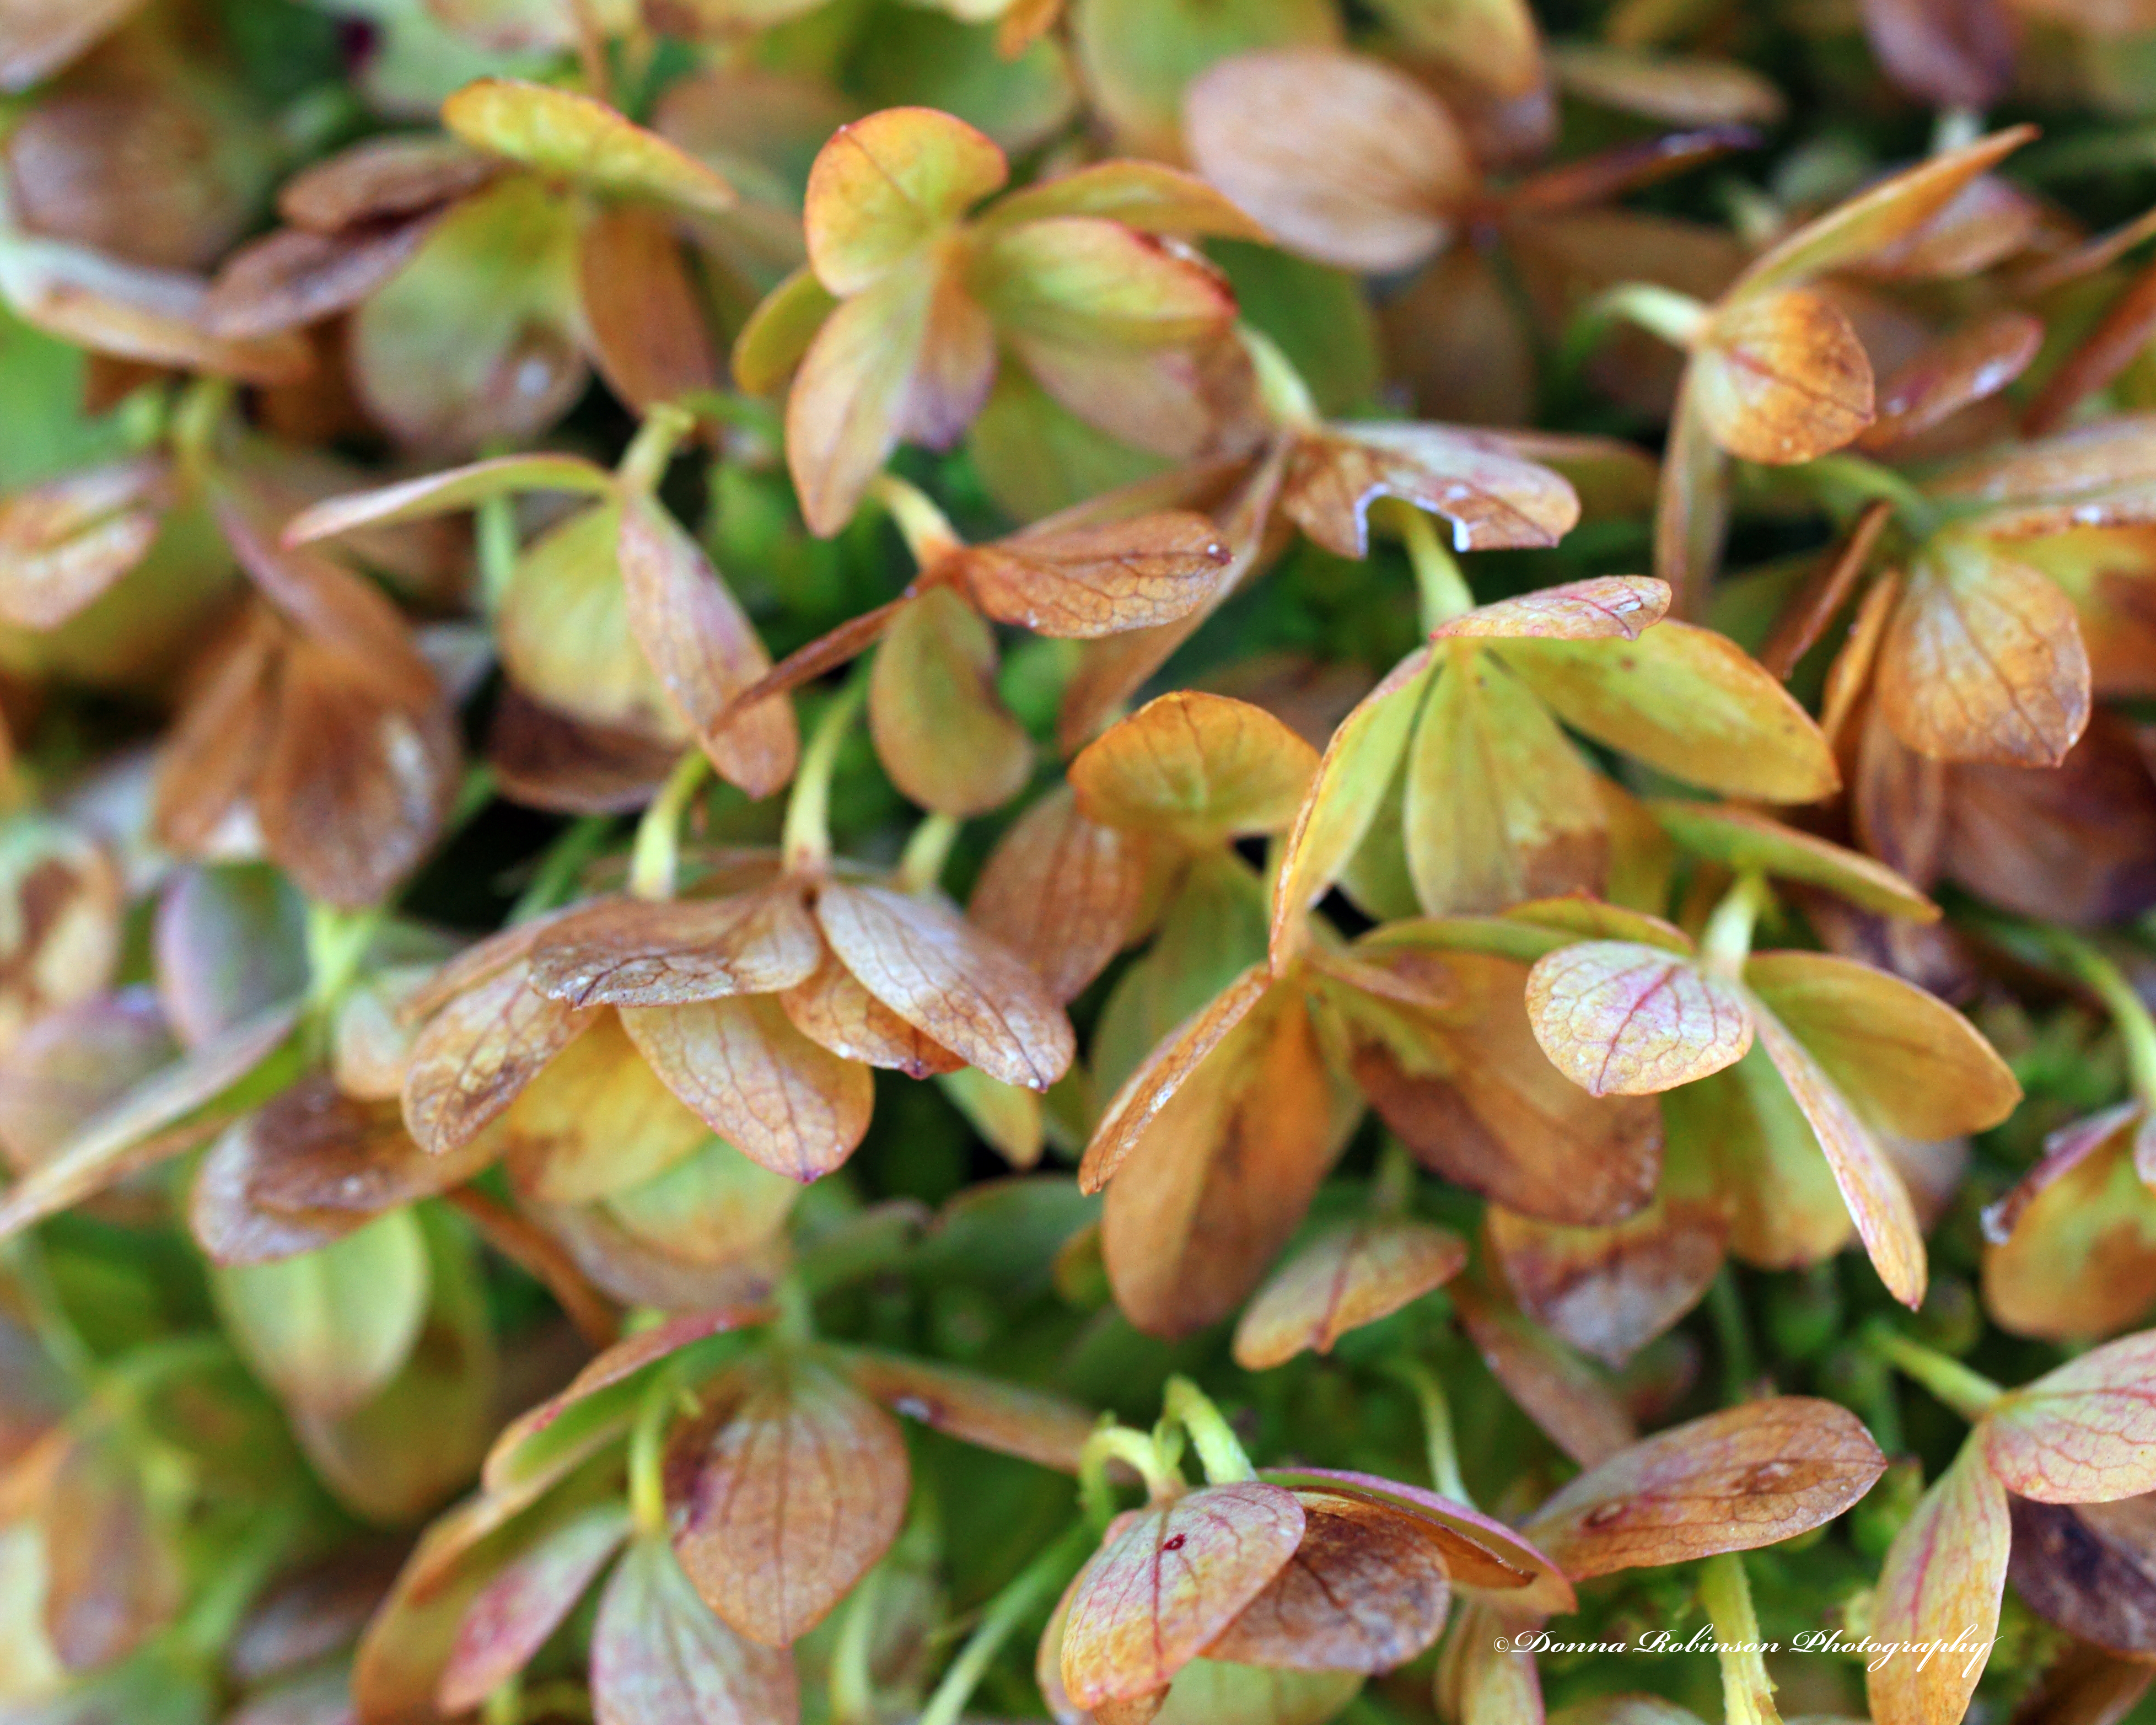
In an effort to get in some “photo-therapy” I decided to pull out my macro lens and wander around our backyard for inspiration. It’s Fall here in Atlanta so there’s not too much blooming. But, nonetheless, there is ALWAYS something to photograph in a backyard.
Take for instance, the faded blooms off a hydrangea bush. They are truly beautiful in their own way.
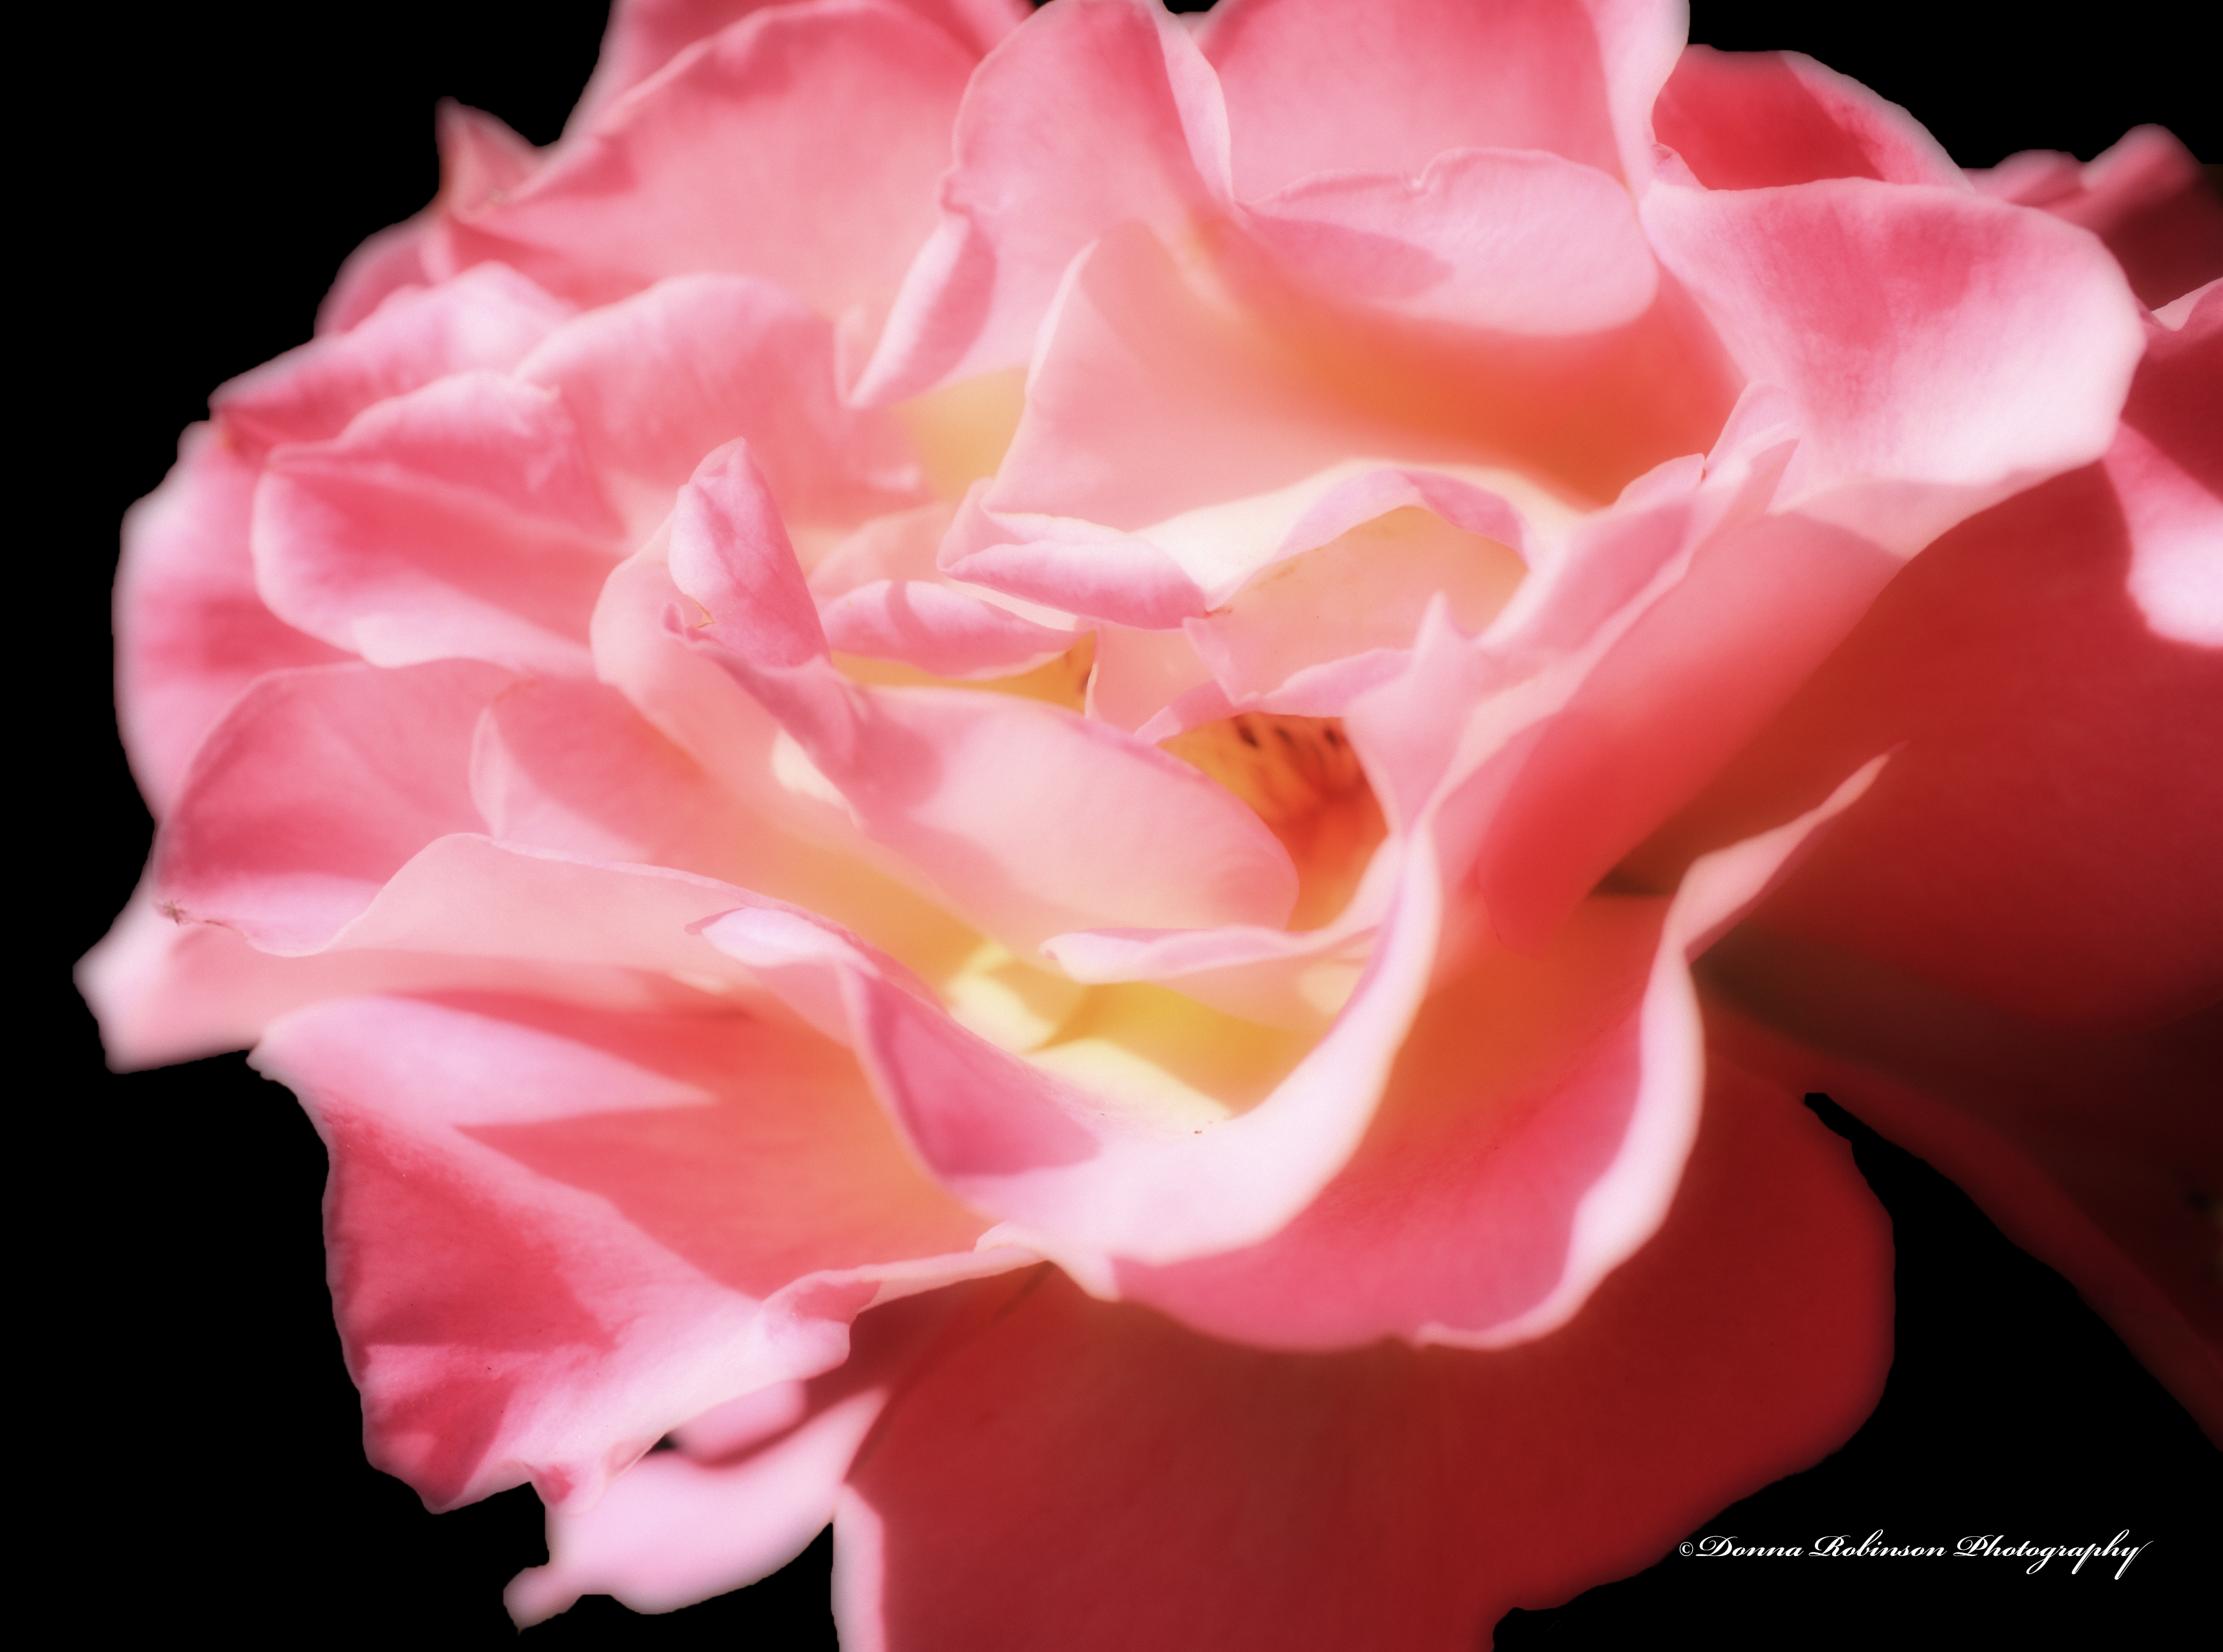
And you certainly can’t deny the beauty of this pink rose. This is the only rose bush that has performed well for us this year.
And Mother Nature gave me a bonus while shooting the pink rose. This little fella decided to get into the picture, too!
I enjoyed getting back out with the Macro lens and also working with the images in Photoshop Elements to enhance their colors and bring out their features.
The fall colors are beautiful and are falling rapidly. So, who knows, I may just have to get back out there for a little more “photo-therapy.” Stay tuned!
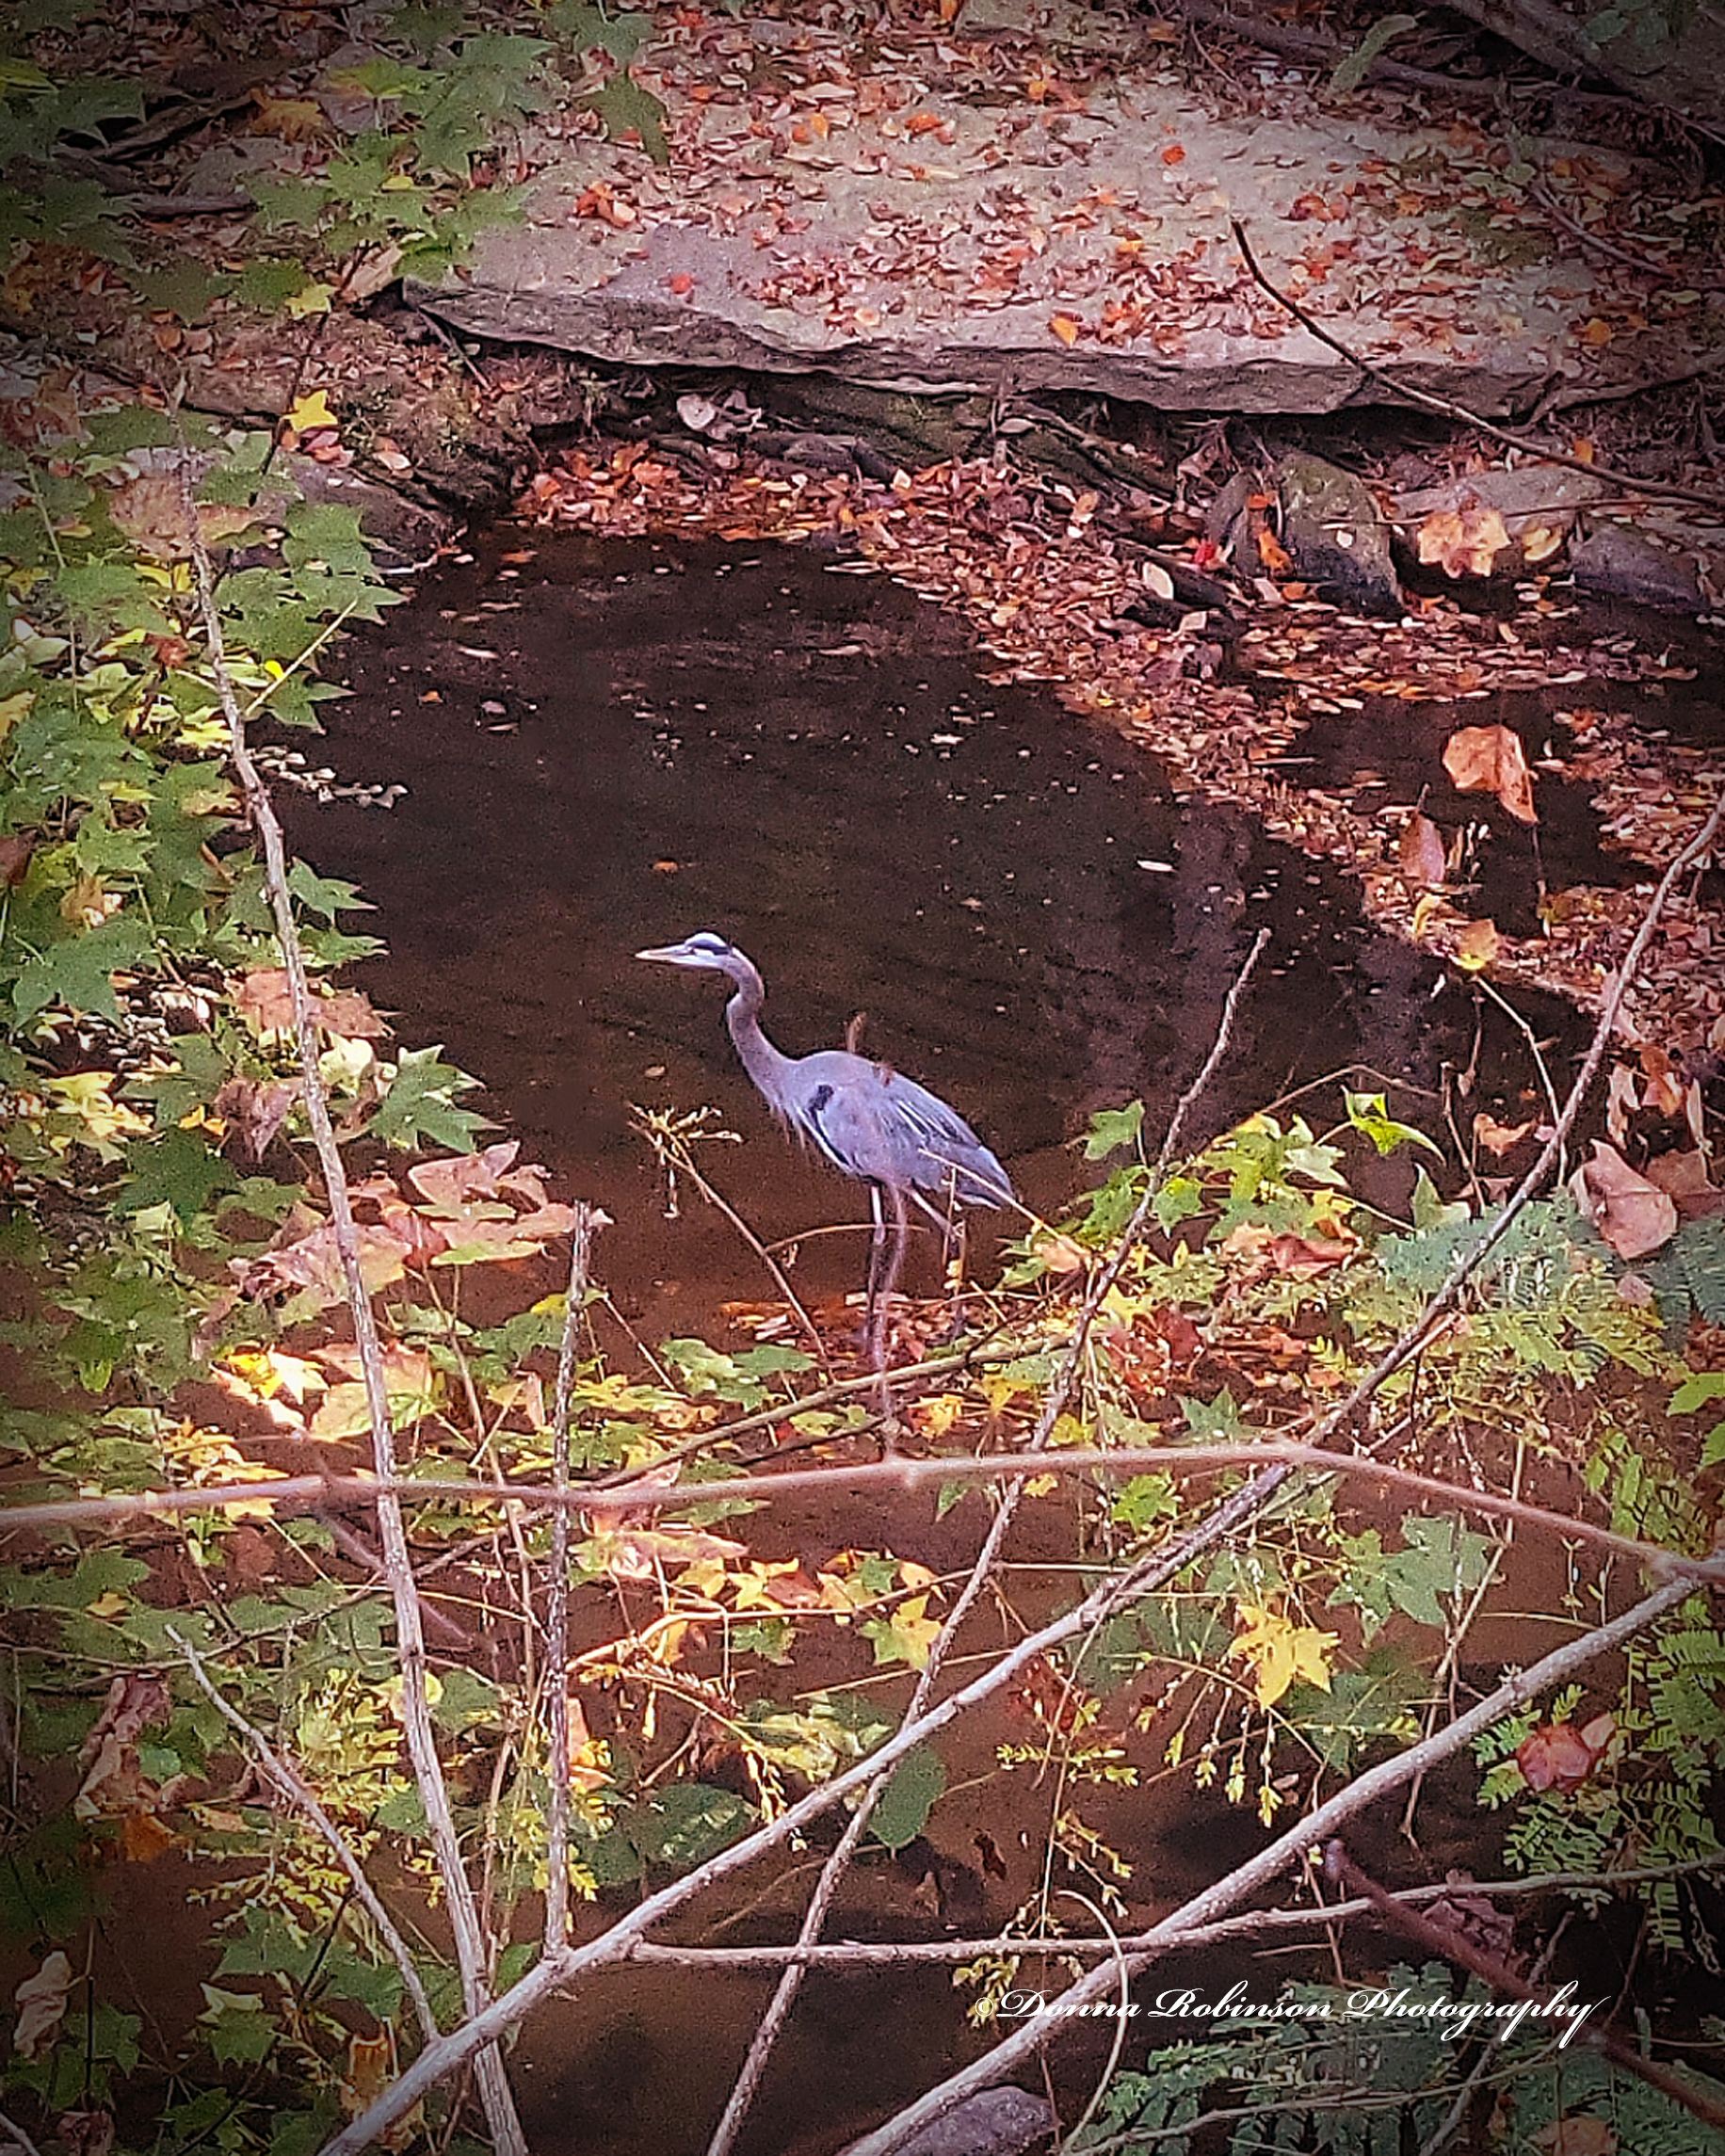
The area of Atlanta, GA we live in is surrounded by several county, state and federal parks and it’s not unusual to see a Blue Heron or two (2) circling above the river or fishing in a feeder stream. Last week on our Sunday walk, this fella flew over us and landed on the stream below the bridge we were standing on. He was so still but looked as though he was getting ready to take flight. Fortunately, I was able to snap a quick photo with my cell phone.
What I like about this image is how the water, rocks, leaves and branches all seem to perfectly frame him. Since I used my Android phone, I did have to make a few adjustments in Photoshop Elements to bring out the colors and details of the Fall leaves. Still, it turned out to be a decent image (just don’t zoom in too closely 😉).