
Silent Sunday
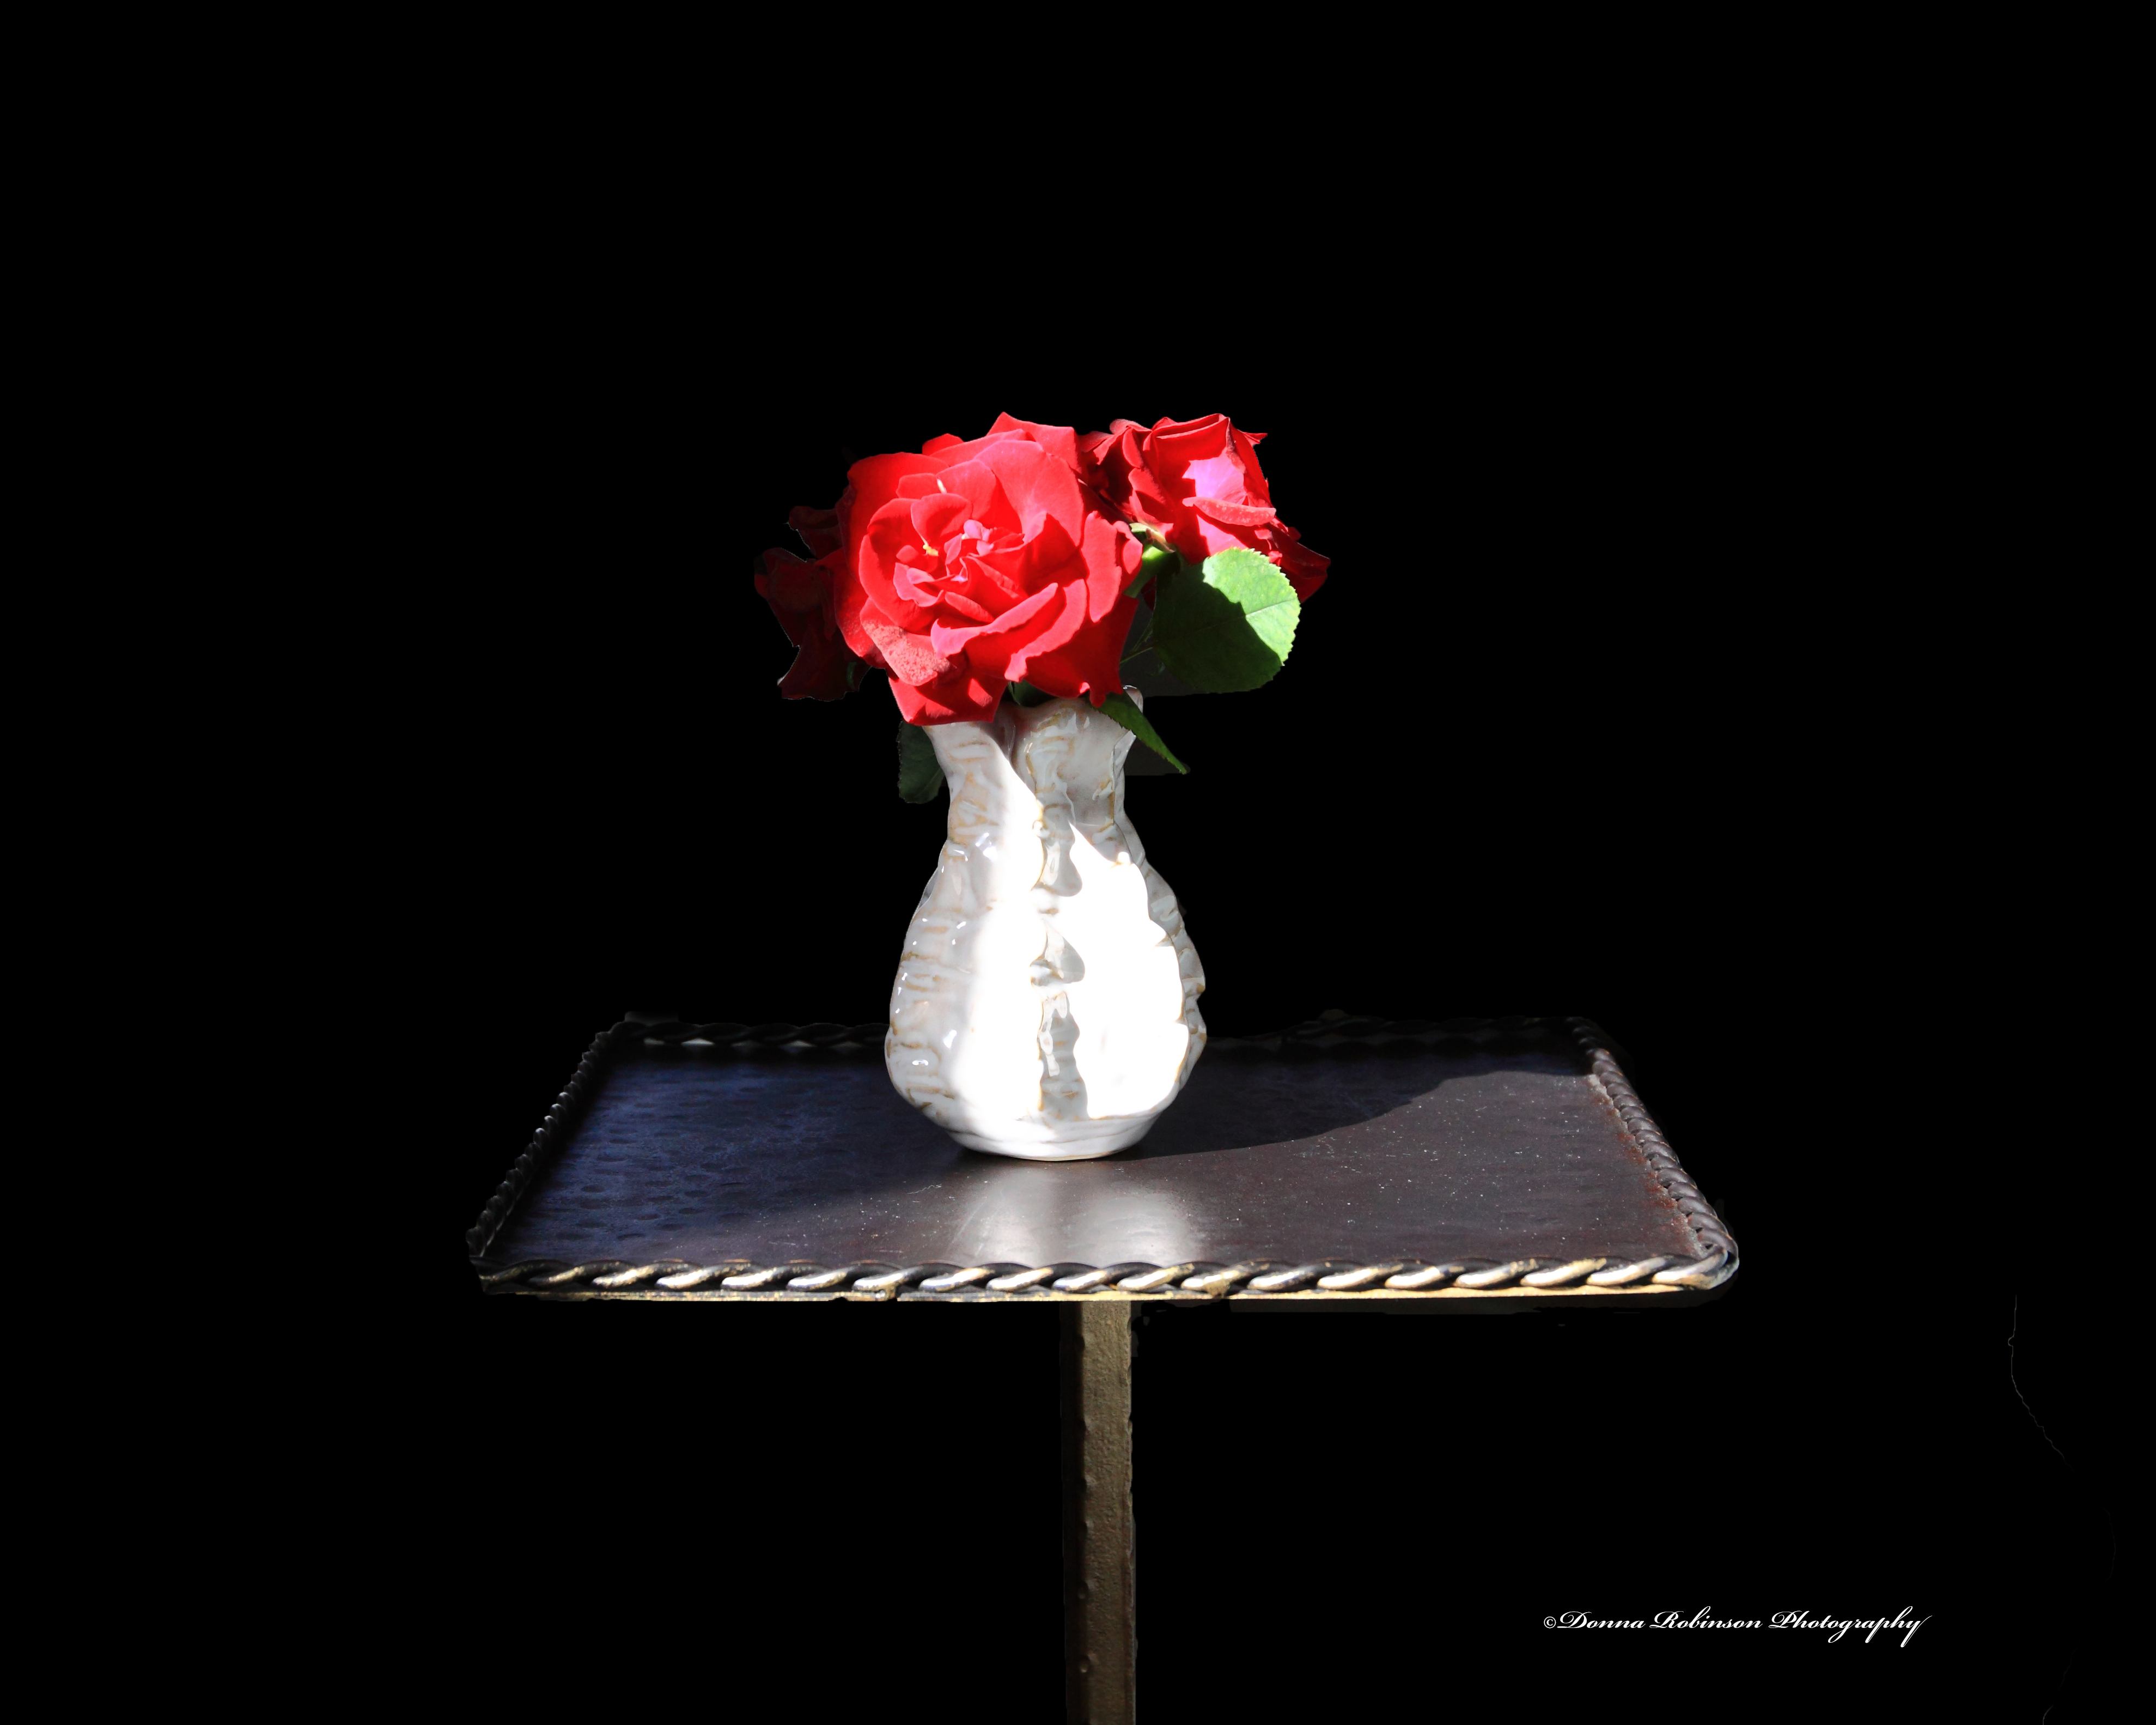
“There is simply the rose; it is perfect in every moment of its existence.“
~ Ralph Waldo Emerson
Ok, so this is my third week joining the “Lens Artist Challenge” and it’s official. I’m hooked! Not only with the challenges but seeing and reading all of the other wonderful posts! It’s truly one of the highlights of my week to participate in the challenges.
This week Tina brings us back to the basics and challenges us with the “Rule of Thirds.” You can read her post here. I must say, I have taken a photography course (or two) many moons ago but had completely forgotten what the 10 Rules of Photography Composition were so this was a fun challenge to revisit rule #1.
The “Rule of Thirds” says your image is divided into 9 equal segments by 2 vertical and 2 horizontal lines and you should position the most important elements in your scene along these lines, or at the points where they intersect.
Landscape photography lends itself well to this rule because you’re trying to capture and recreate in your camera what you see in real life. The rule of thirds can help you determine the focal point and how to incorporate everything else you see.
Take for instance this photo from The Pacific Coast Highway. The anchor (where your eye is drawn) is the carved out wooden stool on the lower left corner. As soon as your eye catches the seat you follow it outward to the road in the background with the coastline running parallel. Funny story behind this photo. My husband and I had passed this spot and he pulled off the road for me to take the photo. I had to turn around in the passenger seat (fortunately we had rented a convertible) to take the shot!

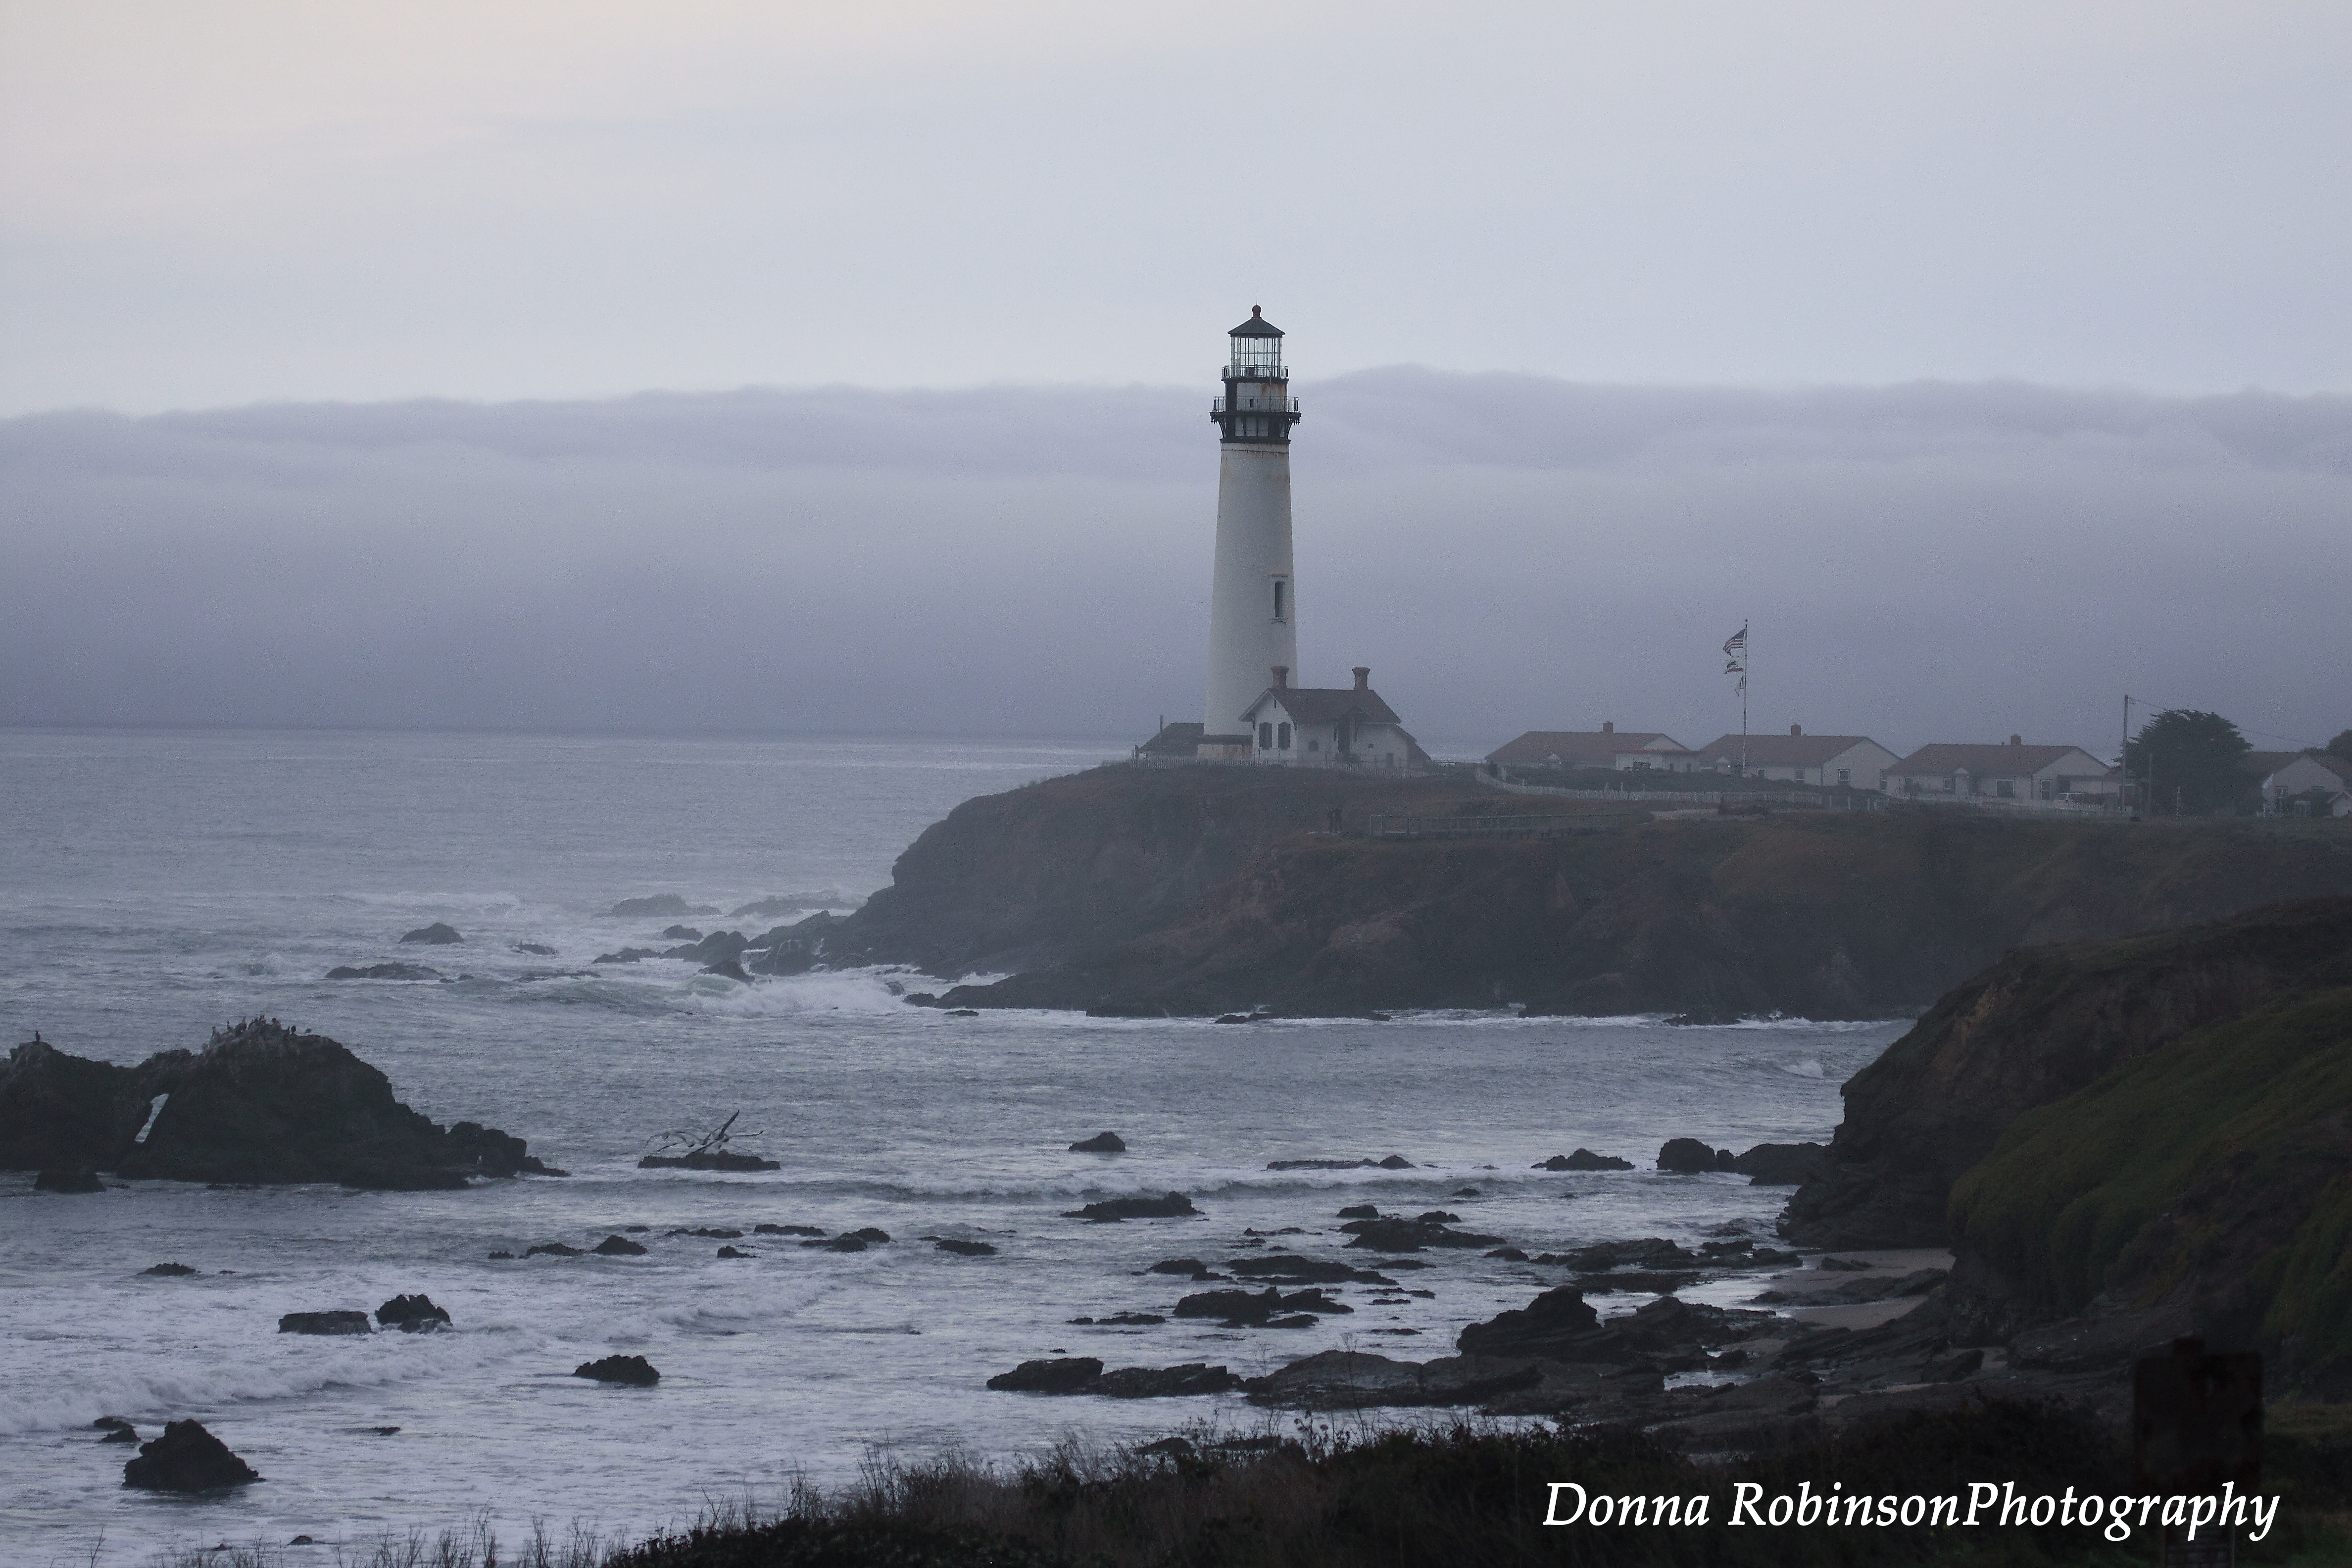
The next photo (also taken on the Pacific Coast Highway) may not quite follow the rule. If you were to put a grid over the photo the lighthouse is pretty much in the center, not on one of the vertical axis (like Tina says, rules are made to be broken). However, your eye is pulled from the lower right-hand corner (the rocky cliff) to the lighthouse. In my perspective the photo would not have told the story about the lighthouse being out on a point, had the rocky ledge in the lower right-hand corner pointed you to it.
When it comes to nature shots, that’s a completely different story. I’m always focused on capturing the subject first and come back to the “Rule of Thirds” when I’m cropping and editing the photos.
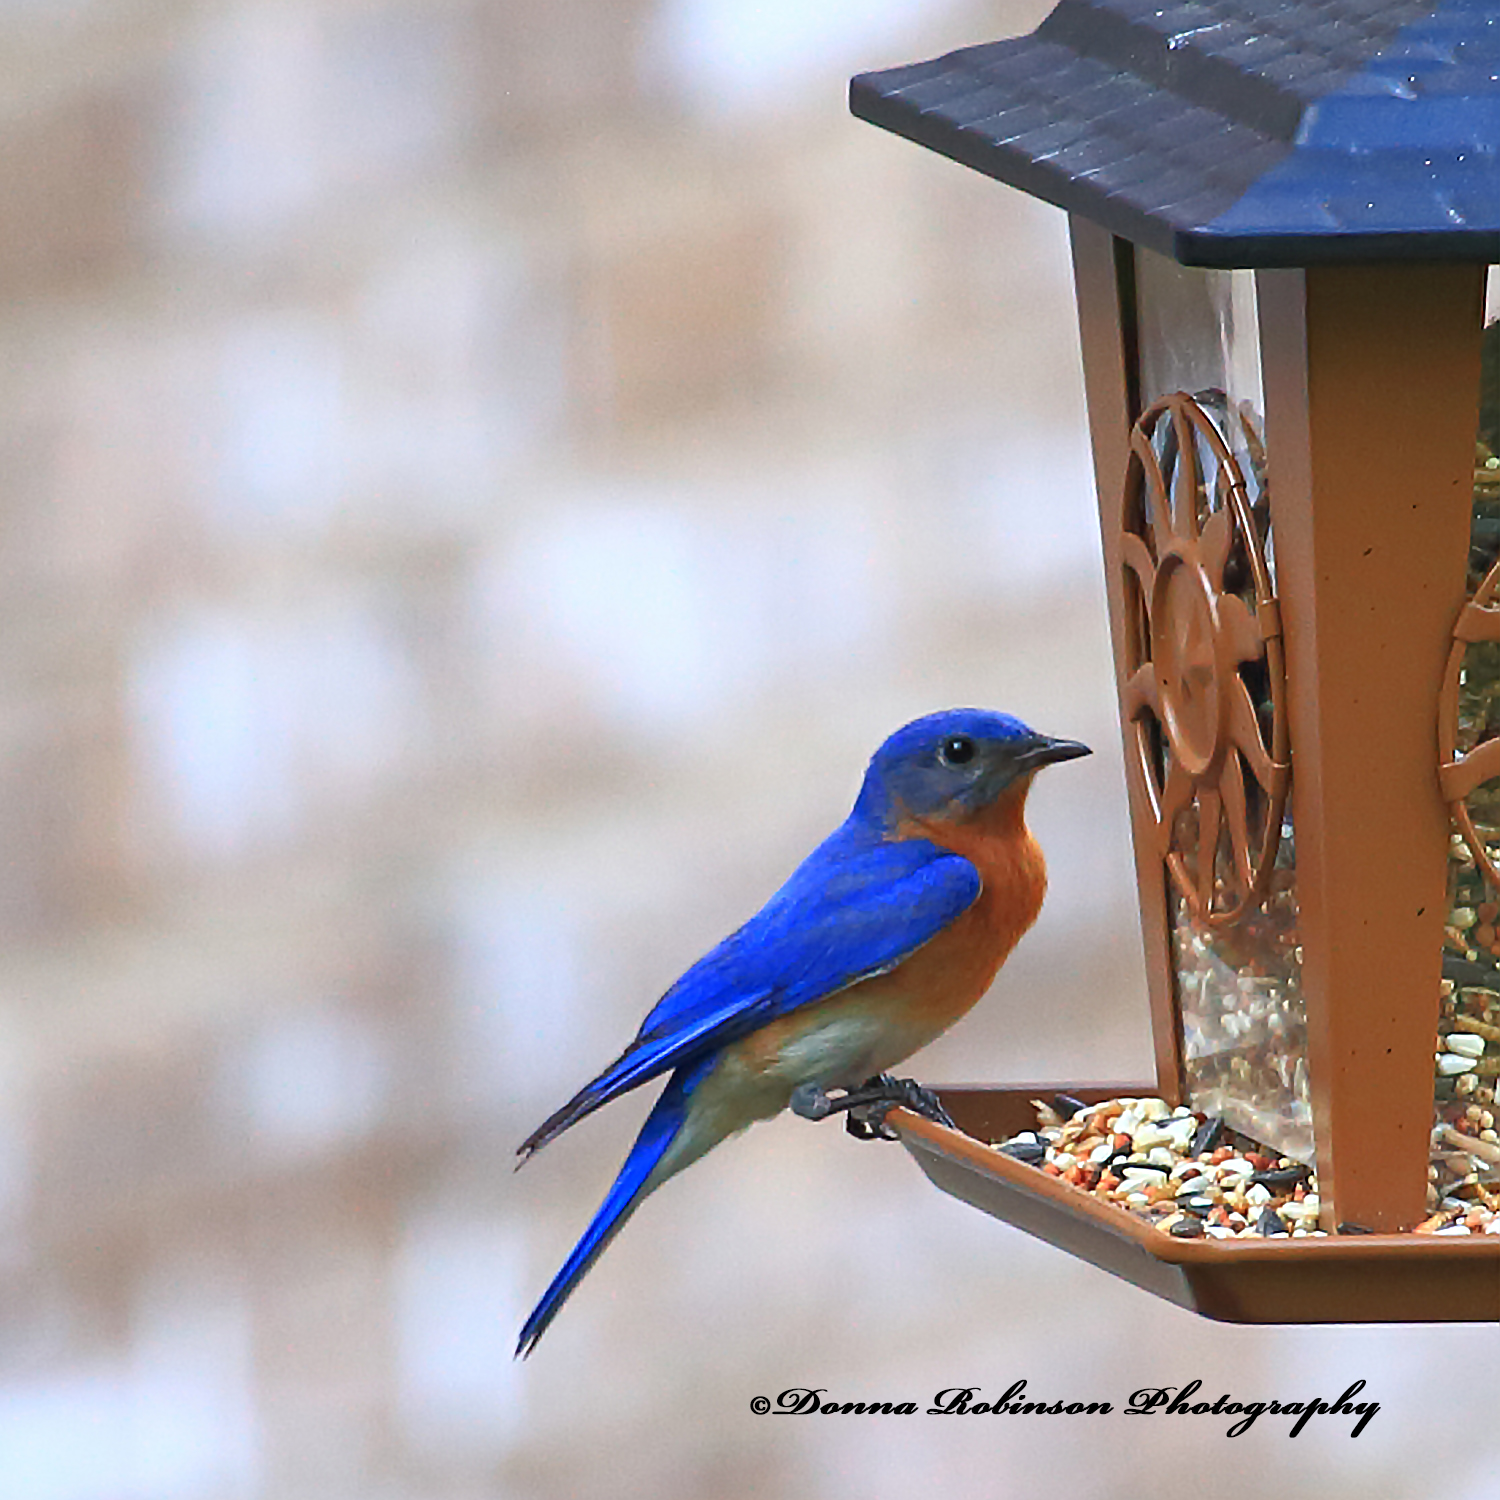
For instance, my bird shots. I like to use them for my weekly quotes so it’s important to me to get the shot of the bird and then worry about composition later. This week’s quote about bluebirds is a great example of the process I go through.
When you look at the original photo on the left it needs a lot of cropping to get to the main subject, the bluebird and the feeder (the second photo). I would rather the bird face the other direction, but I had to go with where it landed (trust me I took several shots to get this one). But what I like with the end result is the quote actually anchors/balances the photo. What do you think?


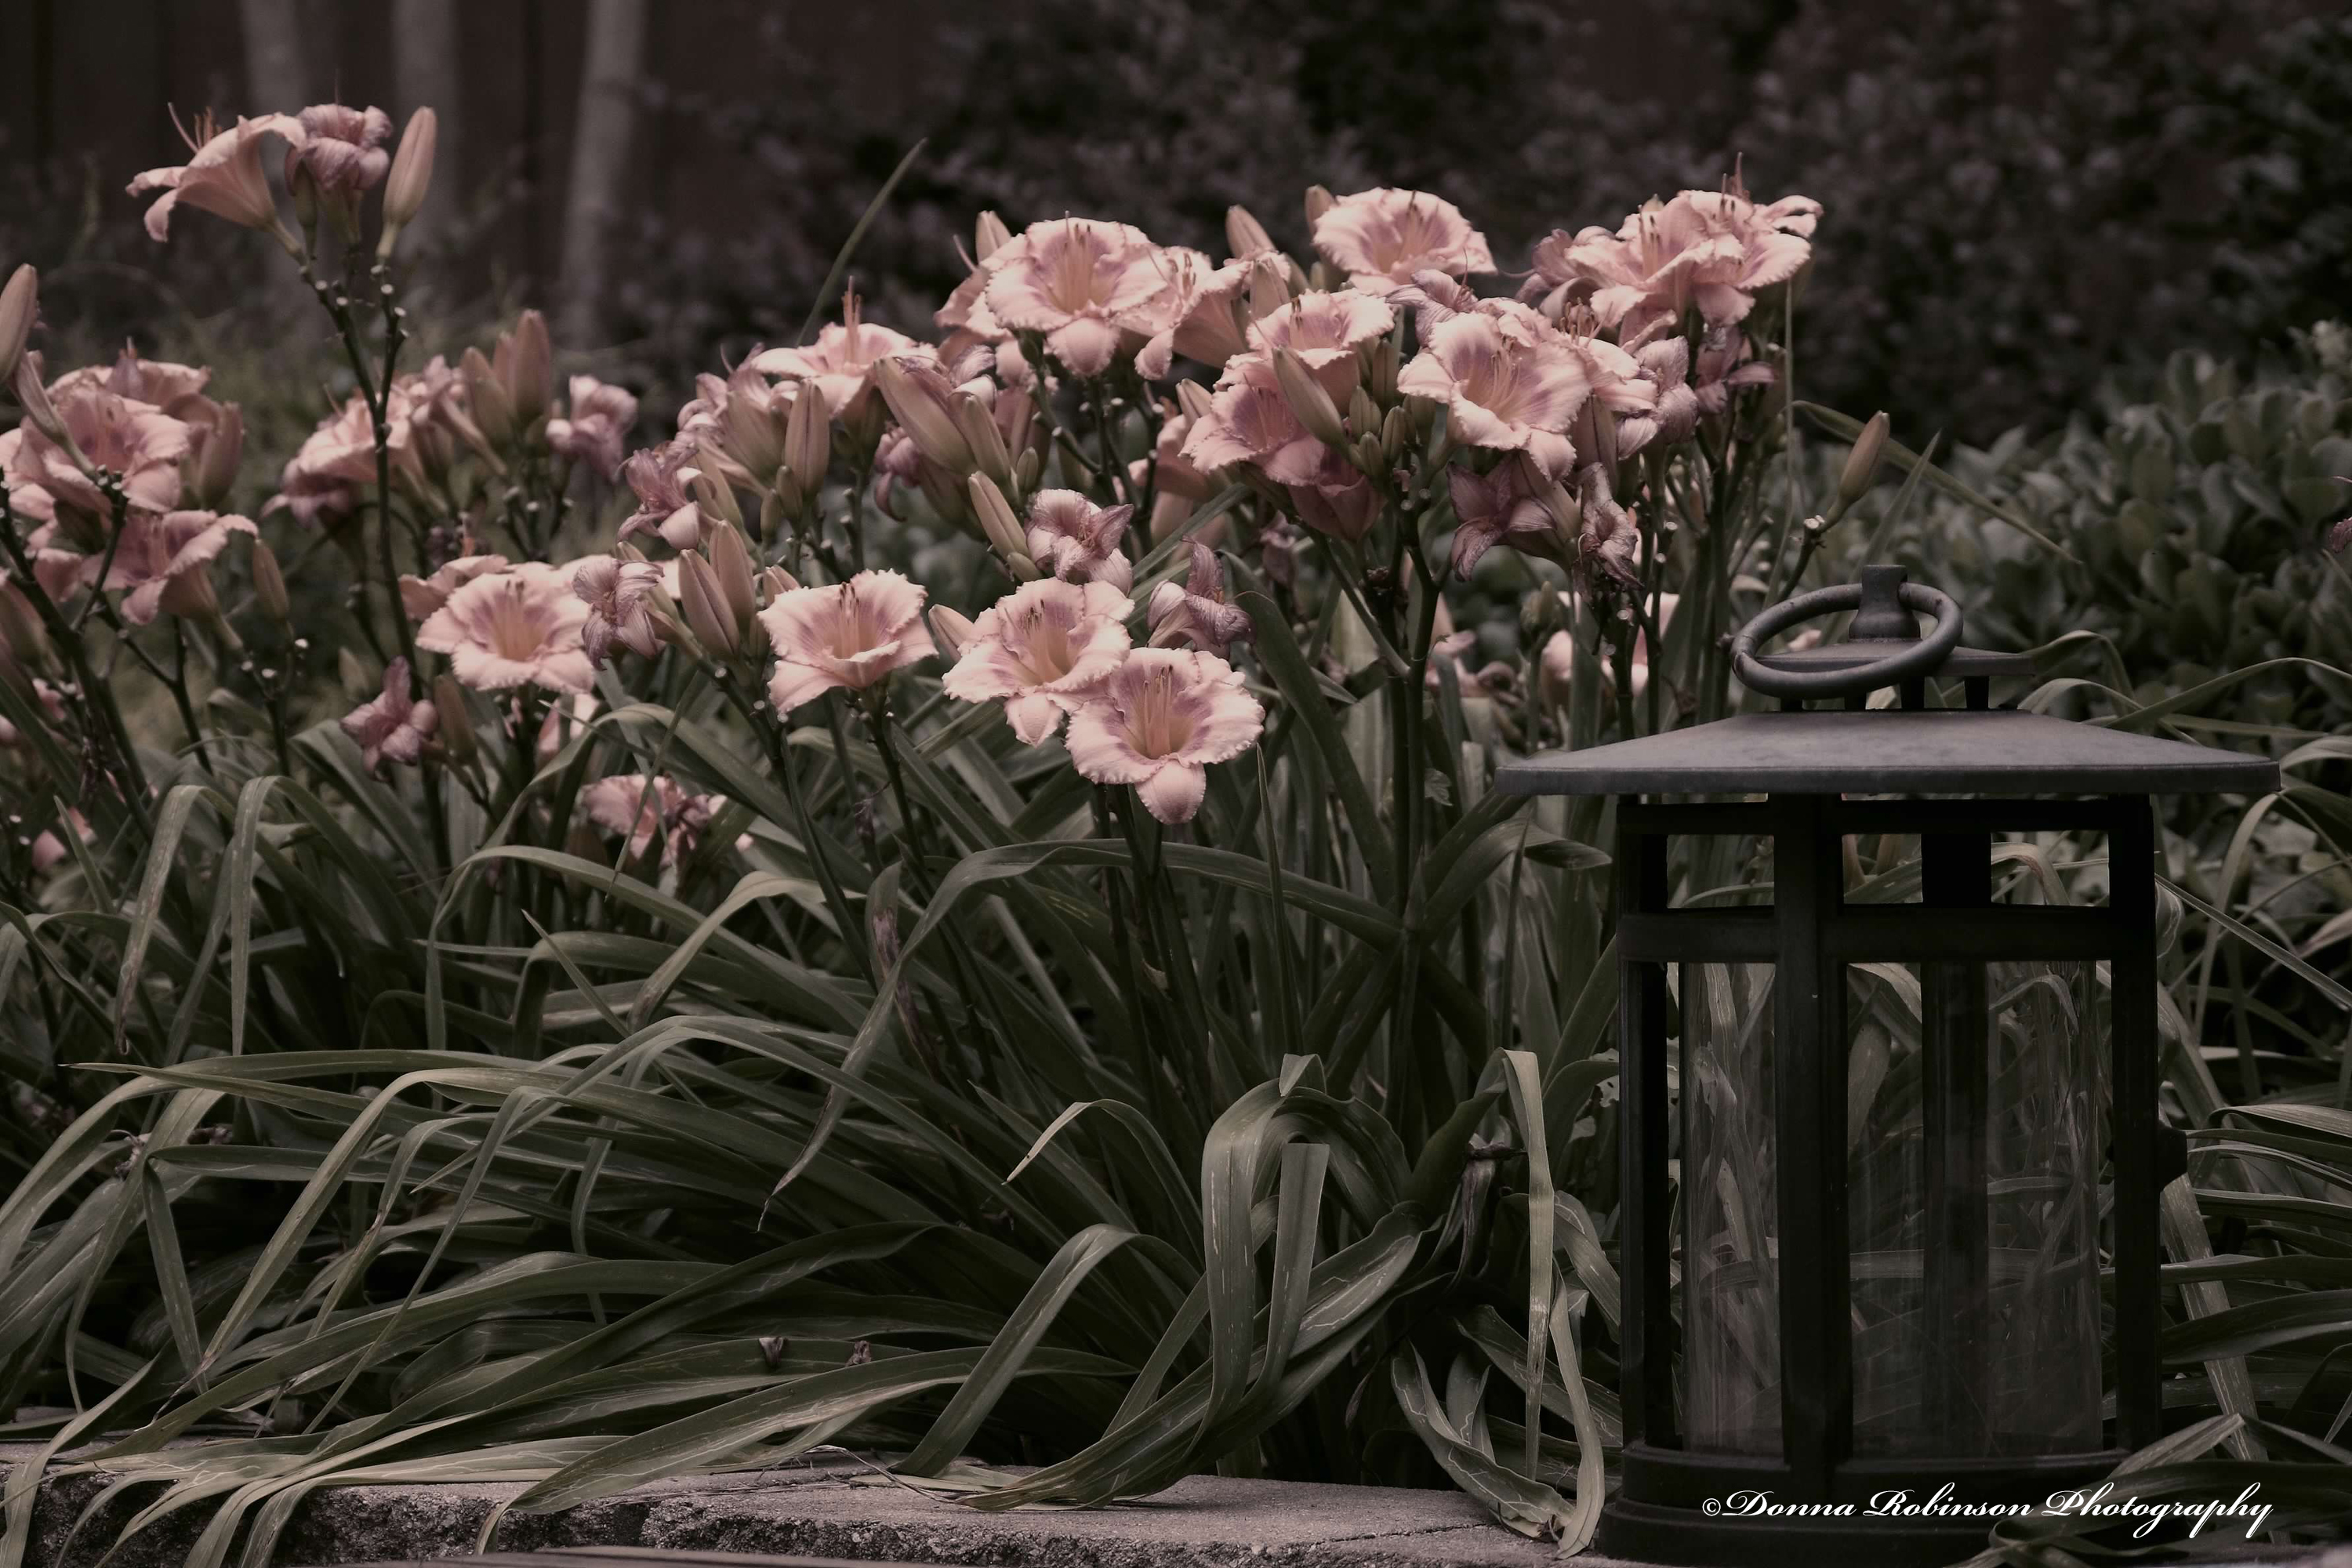
Similar to landscapes, gardening photography lends itself well to the rule of thirds, too.
Like these daylilies and black lantern. The daylilies may first catch your eye first, but because they face in the direction of the lantern, it becomes the anchor.
Or this pink hydrangea cluster. It starts at the lower left quadrant and your eye follows the clusters from left to upper middle to the right side of the image.

As Tina reminded us, rules are made to be broken. Nothing really lines up on any particular axis with this knock-out rose, but it’s obvious the bud is the focal point, accented by the Boka image of the open bloom in the background.

As a closing thought, the “Rule of Thirds” is a good tool if you find it difficult to get balance in your images.
Thank you, Tina for the refresher on the rule of thirds. I’m confident I’ll keep an eye out more when taking photos.
~Donna
P.S. –Interested in joining Lens-Artists? Click here for more information
Happy Friday, everyone!

May your day and week be as bright and beautiful as this Knock-Out Rose. Here’s to life and it’s possibilities!

I’ve been experimenting with a new camera lens, Canon 35mm, f2.8 Macro. What a great lens to use with flowers, food photography and up close still life! Surprisingly, it does take a little practice to get used to a fixed focal length, understanding exactly what will/won’t be blurred in the background and how light hits your subject…….definitely a good exercise for practicing a little of each of the photography rules.
So, how is it going? Here are a few of my practice shots:
On our front porch we have three planter boxes with Geraniums so I started with these. As you can tell, the Pink Geranium really pops against the black wrought iron railing and the blurred Geraniums in the background. I was able to get really close to these buds and as you can see captured the detail of the fur and pollen on the leaves.
I moved to the backyard and focused in (no pun intended) on the Purslane I recently planted. In the photos below, I was able to capture the detail of the star shaped pollen stem of the Purslane flower. I love how the lens captures the greens, yellow and oranges of each of the flowers.
I think my favorite Macro shots are of the rose bud below where the lens picks up the small specs of yellow pollen. Do you see what I mean about paying attention to what gets blurred in the background? I love the composition of the full bloom being blurred compared to the closed bud in the foreground (this is actually the same bud, taken from two (2) different angles).


The above photos were shot while hand holding my camera, I can’t wait to see how photos turn out when I’m in a little more controlled environment using a tri-pod and controlled lighting.
If you’re looking to try your hand at Macro photography, check out this link to Digital Photography School 5 Tips to Better Macro Photography. This post by James Dempsey is a quick read and gives you the basics. If you don’t have a macro lens, don’t get discouraged, those I-Phones and Androids are great for Macro photography, too! There are even small attachment lenses you can purchase to help achieve great results. Here are a few sites dedicated just for camera phones: iPhone Photography School and How to Get Stunning Macro Photos With Your Mobile Phone
Do you have any tips and examples of Macro photography ? I’d love to see them in the comments section.
Happy snapping!
Donna
The world as I see it
Fun, Photography & Friends
Nature and Travel Through Brazilian Eyes
Every Day is a Gift!
Retired and Enjoying Every Minute of It
Welcome to my creative corner! Here, I share my photos, travel stories, random thoughts, and a bit of myself.
Moving forward carrying grief
Random thoughts, life lessons, hopes and dreams
"A photograph shouldn't be just a picture,it should be a philosophy" Amitkalantri.
Historical Fiction Author
Live the best of your life every day
“Beauty can be seen in all things; seeing and composing the beauty is what separates the snapshot from the photograph.” Matt Hardy
To See a World in a Grain of Sand...
Wellness and Fitness Enthusiast
Teaching the art of composition for photography.
Creative Exploration in Words and Pictures
"Two roads diverged in a wood, and I— I took the one less traveled by, And that has made all the difference." The Road Not Taken, by Robert Frost
Capturing nature's peacefulness one photo at a time.
photography and life
Reflections on places traveled and photos taken.
Book reviews, photos, and more...
Seeking God's glory in the midst of mothering, marriage, and everything in between.
Expressing Thought Through Photography
✨✨Inspiring Poems, Articles, Pictures and much more!!! ✨✨
A Londoner and a San Diegan
Event Photography. Sony Alpha Shooter.
Louella Lester - Seeing and learning while holding camera and pen between me and the world.
capturing memories one moment at a time
Life is a Journey Not a Destination......You Are the Artist Paint What You Will
My experiences in Italy and the world
Photography Gives Me Insight Into The World Around Me
Green Plants Based Living, Gardening and Home Care
Welcome to Simons Blog where I like to share my favourite images with you
gardening enthusiast & amateur photographer
When you don't see your path, you can build one.
A travel documentary with my cat Callie!
Notes on Seeing, Reading & Writing, Living & Loving in The North
A Blog about Keepin it Simple
New Zealand
...whatever is lovely, whatever is admirable — if anything is excellent or praiseworthy, think on these things. Phil. 4:8
Traveller, photography
I'm Emily, a female biker who loves to travel, drink coffee and pet dogs.
